1.30.2015

Fun in the Rain with Chickaniddy Crafts

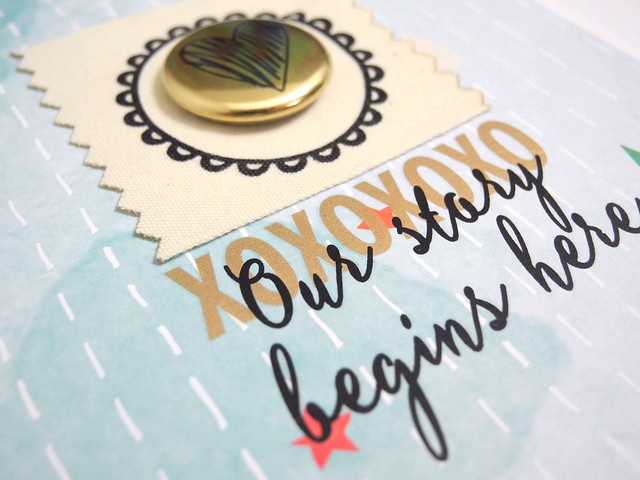
Today is my final post as Guest Designer on the Chickaniddy Crafts blog. I have absolutely LOVED working with Chickaniddy! Their collections are just so much fun! I have used the super fabulous Jolly Good collection, once again, showcasing the incredible versatility of this line. I love it. For reals, though.

Hello Friend


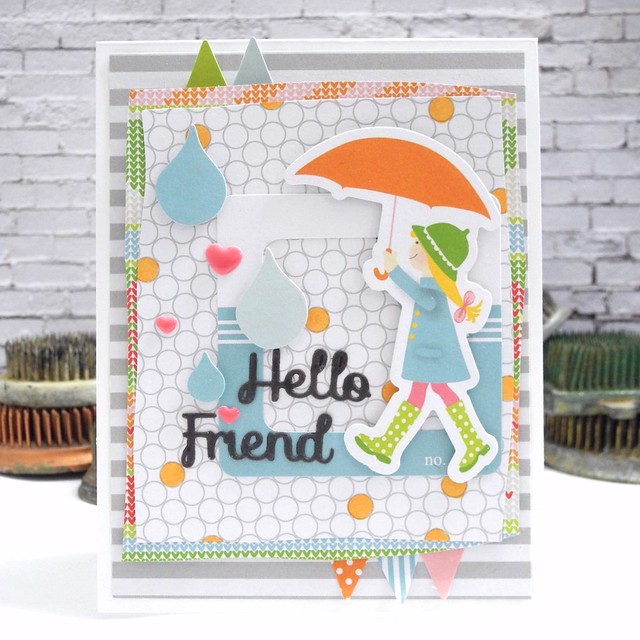
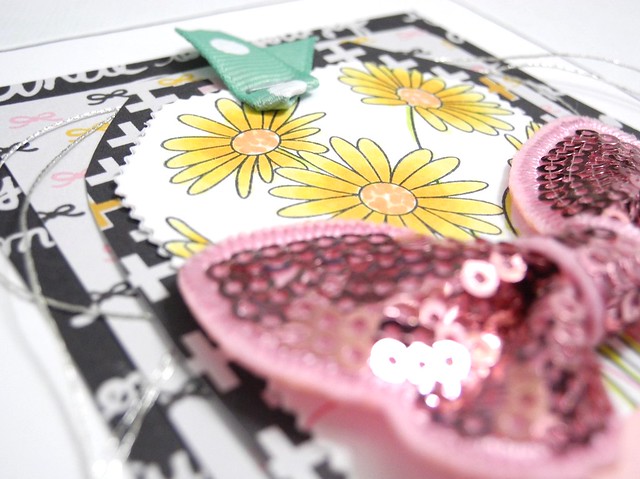
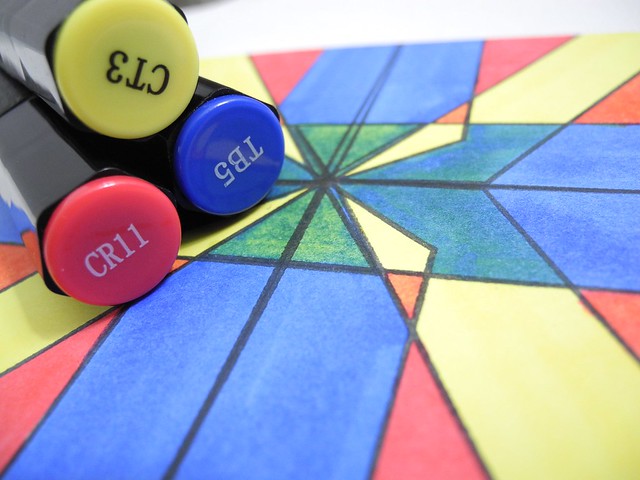
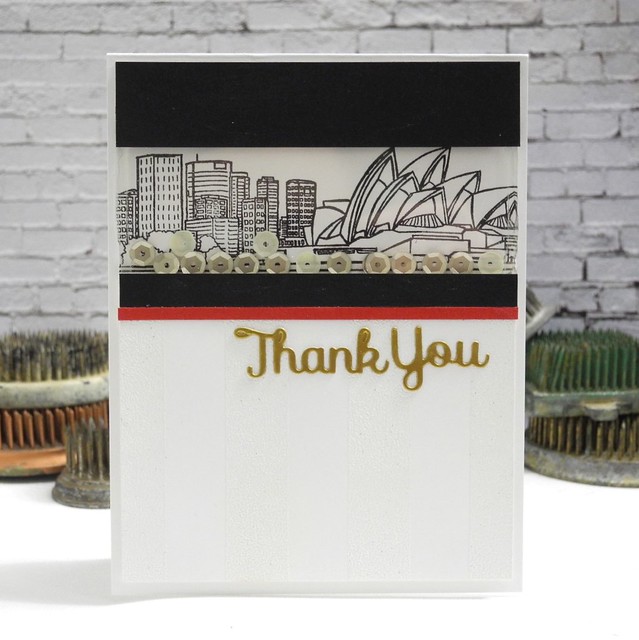
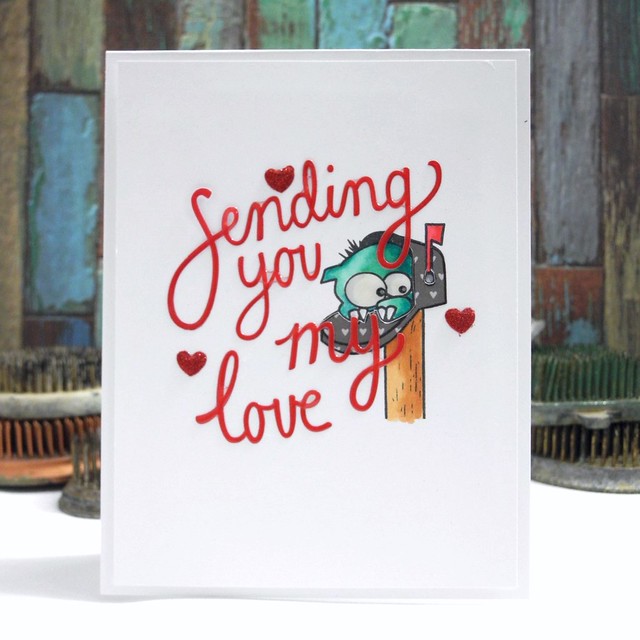
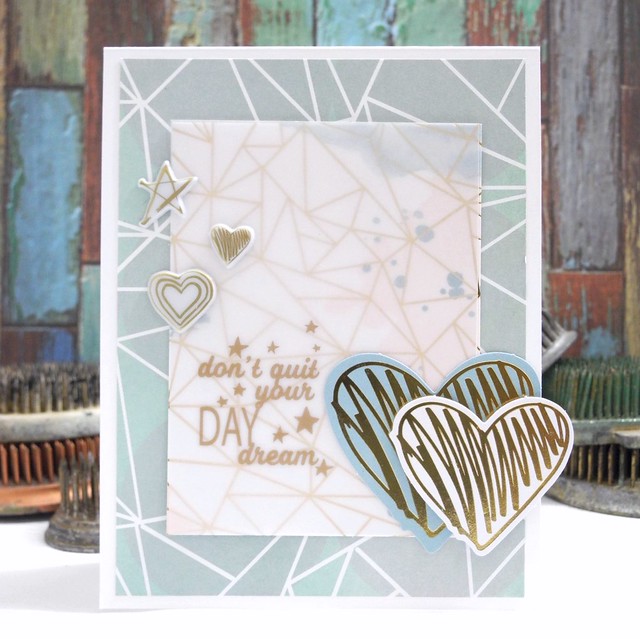
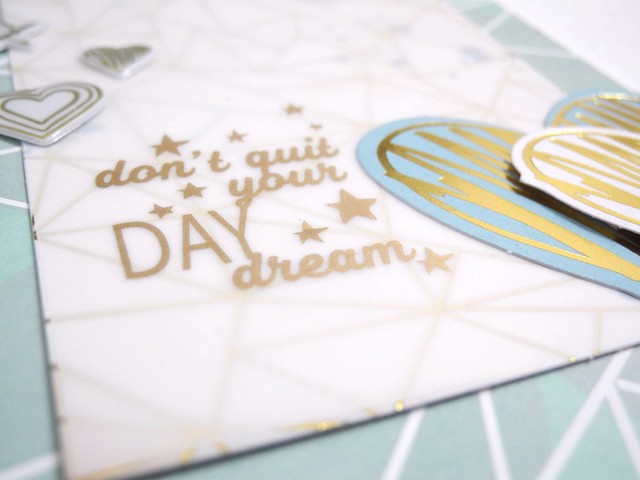
I pulled out not only the papers, but stickers and die cuts for this super fun rainy day hello card. I used simple techniques to add both color and dimension and you can read about those on the Chickaniddy blog! I just love how all of the elements come together so well!

Hello Friend (detail)


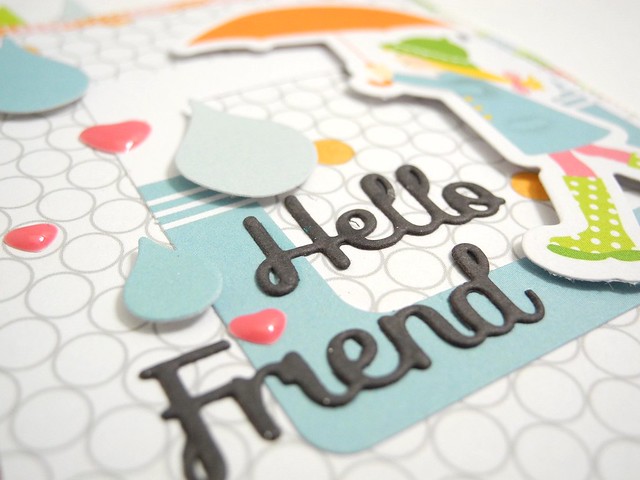
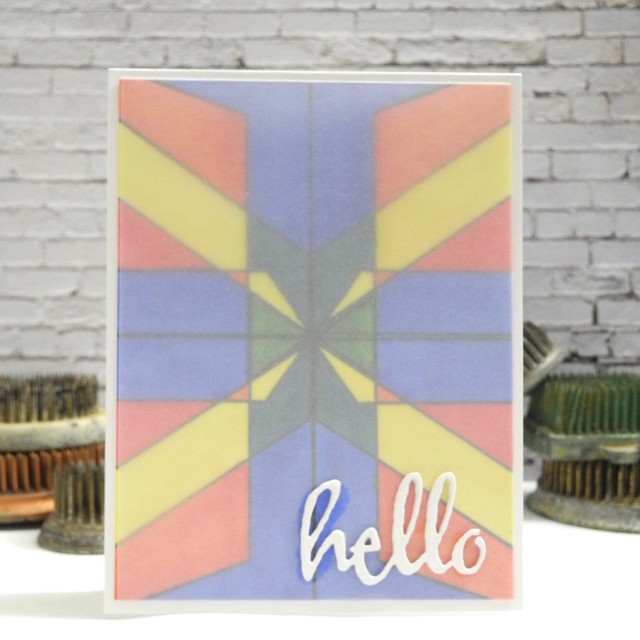
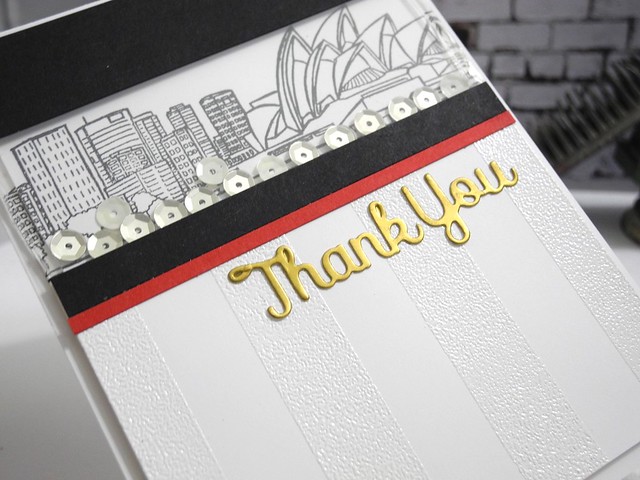
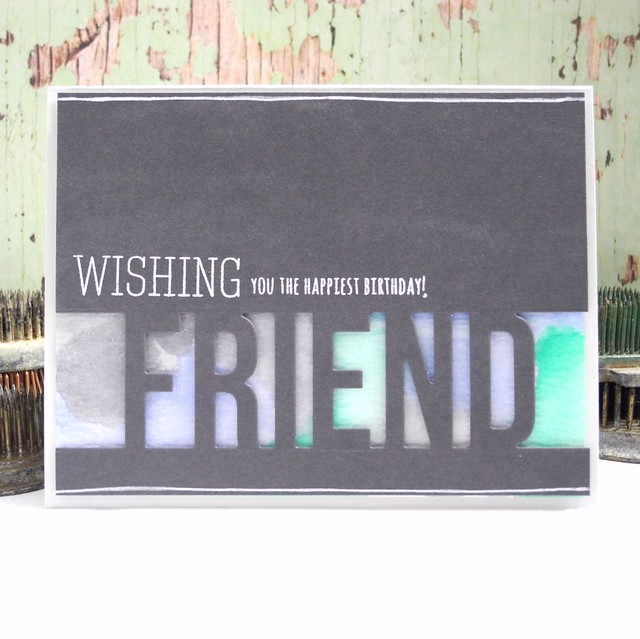
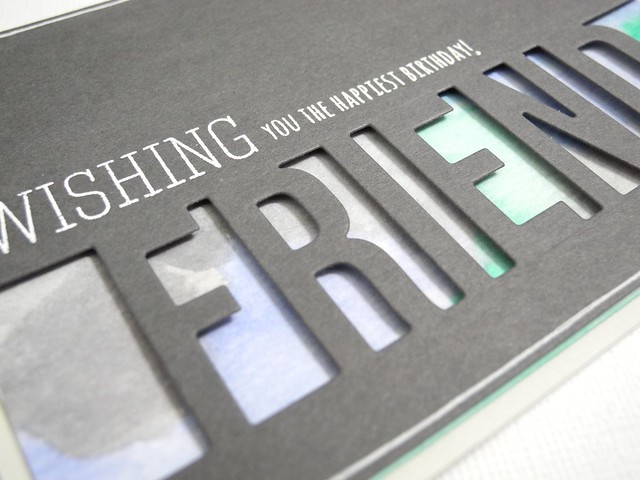
This Spellbinders® sentiment die was the perfect fit for this fun, rainy day hello! I sort of love it.

Be sure to head on over to the Chickniddy blog for details on the techniques I used and to check out the amazing inspiration provided by the Chickaniddy design team!

Have a Happy!

Love You More

Have you SEEN the most recent embellishment kit from Pinkfresh Studio? You guys, I love this kit so much! I have a post up over on the Pinkfresh Studio blog showcasing TWO cards using this kit. I will show you one here, but you are just gonna have to venture on over there to check out the other one! (I'm mean like that. HA!)

Our Story


I used a patterned paper from the Up in the Clouds collection for the background and then used the rub-ons directly over the pattern for the sentiment. I absolutely LOVE that you can so seamlessly overlap rub-ons to create your own sentiment! For REALS, you guys!

DSCN6692


I love all of the texture this brings, too! The canvas tag combined with the shiny gold flair is just so much fun! LOVE THAT!

AND... Pinkfresh Studio is GIVING AWAY a one year subscription to the kit! WHAT?! Yup! This is an Instagram Giveaway so, yes, you have to have IG in order to enter. Be sure to check out Pinkfresh on Instagram for your chance to win!


This is the current kit. You guys!!! Are you seeing all of that goodness? tons of embellishments, stamps, dies, stencils.... *sigh* It's a very good thing.

Have a Happy!

1.29.2015

I Like You

No, for reals, though. I do. I like you.

I Like You


I have had these Cute Fruit stamps from Paper Smooches for too long considering their lack of ink, so I pulled them out to create this super fun little card. And it makes me happy. And I love it. Lots.

I like You (detail)


I used a couple of ink colors and a simple inking technique to add dimension and color to the pears.

In other news, I got to leave my house today, so that's a good thing. However, they are predicting more snow tomorrow and Saturday, so I may just punch the snow in the face at this point. And that's easy to do, seeing as it is at eye level in many places. HA! *sigh* Perhaps I will just enjoy my iced coffee and deal.

Have a Happy!

1.28.2015

You Were Meant To SHINE!


It is ANYTHING GOES week this week on the Simon Says Stamp Wednesday Challenge Blog! This week the Design Team is using Clearly Besotted and/or Lil' Inker Designs products on our projects. You don't have to use them to play along, but if you've got some we'd love to see them! I chose a super pretty stamp set from Clearly Besotted that I had in my studio just WAITING to be inked. I love it!

You Were Meant to Shine


I combined the gorgeous flowers from the Celebrating You stamp set with the super cute Bella Rouge collection from Pink Paislee. This is one of my favorites right now! I absolutely LOVE it! Just look at that BOW!!! LOVE IT!

Shine (detail)


I colored the flowers with Spectrum Noir pens and die cut the Spellbinders tag to layer over free-hand cut papers. A bit of ribbon and string help to add accent color and then... THAT BOW! *sigh* I love that bow. You can find my complete supply list below.


Now it's YOUR TURN! Create a NEW project and link it up to the ANYTHING GOES challenge on the Simon Says Stamp Wednesday Challenge blog for your chance to win a $50 Gift Voucher to the Simon Says Stamp Store! WHAT?! Yup. Totally.

Supply List (Note that links are affiliate links. Your support is always appreciated!)

Markers: Spectrum Noir
Stapler/Staples: Tim Holtz Tiny Attacher

Have a Happy!!!


1.26.2015

A Primary Rotation


It's a chilly Monday morning and it looks like we may be getting one heck of a blizzard tonight and tomorrow! That means extra time at home and THAT means extra crafting time! (This is me attempting to see the bright side of over two feet of snow coming this way. *sigh* LOL!) Today I have another fun card for the Winnie & Walter Birthday Bash to share with you. This one was challenging, but turned into something I really enjoyed working through! I was inspired by the In Rotation challenge.

Primary Hello


Let me begin by saying that this card is not perfect. And I debated sharing it. BUT... you know what? I'm proud of it anyway, so I AM sharing it. Because it's kind of cool, you guys! For reals, though! Instead of basing my rotation on the center of the card I actually used the giant chevron from the Winnie & Walter V is for Chevron set to create a rotation in each quadrant of the card. I then colored them with THREE Spectrum Noir pens. Just three. I allowed the coloring to overlap to create new colors. LOVE!!!

Primary Hello Process


As you can see, the coloring was SUPER bright and bold. Which was awesome, but also a bit strong. I layered a sheet of vellum over it and then die cut the Hello cutaway several times to create the sentiment over the vellum. It's simple, but I like it. I tried several things without the vellum and the background was just too strong. I haven't decided if I am glad I went with it or not yet. HA!

Primary Hello (detail)


That design, though, you guys. That's why I shared it, despite the imperfection. That design is just plain COOL! And it was fairly simple to do... just a hollow chevron stamp. And a few pencil guidelines. LOL! Don't forget to try fun new things with your stamps! Pretty awesome stuff can come from it!

Have a Happy!


1.23.2015

Because Sometimes You Want Clear Shaker Sides

So. Here's the thing. I had a vision. I made a sketch. It was going to be GREAT! It all started with this photo, but there was a problem.


This is the current inspiration photo from the Runway Inspired Challenge. As soon as I saw it, an idea popped into my head, so I grabbed my trusty Post-It notes and sketched out a card. I love the sketch and finally go to turn that vision into a reality last night. Only one problem. My vision had a shaker going across the front of the card. See those floral panels on her jacket? For some reason they screamed WINDOW to me, so my mind went to a shaker card. BUT...the design I had sketched sort of neglected to remember the fact that sequins will fall out if shakers don't have sides. My shaker didn't have sides.

Sydney Shaker


CHALLENGE ACCEPTED.

Yes, my friends, despite having not thought through the engineering quite as thoroughly as I perhaps should have in the sketching stage, I managed to maintain my original design idea and still have my shaker card. WHAT?! Yup. For reals, you guys. How did I complete these feat of awesomeness, you ask? Kool Tac Clear Foam Tape, my friends. To. The. Rescue. Yup. The sides are sealed with clear foam tape. Under the acetate. And you can barely see it. And I love that. And this card, you guys... THIS CARD!

Sydney Shaker (detail)


I heat embossed the bottom panel with Wide stripes for a subtle bit of texture. The red stripe was inspired by the belt buckle in the photo, along with the stripes found throughout. I just really love how this all came together. It's one of my favorites, for sure! You can find my complete supply list below. (All Simon Says Stamp links are affiliate links and your support is always appreciated.)

White Cardstock: Crafter's Companion Ultra Smooth White
Black and Red Cardstock: Simon Says Stamp
Gold Cardstock: Bazzill Gold Metallic Cardstock (Again... SO WORTH IT!)
Stamps: Altenew Sketchy Cities Abroad, Simon Says Stamp Wide Stripe
Dies: Spellbinders Celebration Two
Adhesive: Kool Tac Clear Foam Tape, Giant Roll of Scotch Foam Tape
Ink: VersaFine Onyx Black, VersaMark
Sequins: Hazel and Ruby
Acetate: Judikins Embossable Window Sheets

Have a Happy!

1.22.2015

Happy Retirement


Yup. I have another Winnie & Walter Birthday Bash Challenge card to share today! This time I was inspired by Shay's ONE Challenge. And by 'inspired', I mean it was kind of freaking HARD, you guys! For reals, though. For some reason, I was struggling, but then I just decided to DO IT and I made it happen!

Happy Retirement


I used ONE die, ONE stamp set, and ONE color along with neutrals. I also used ONE large star and ONE small star (or ONE sticker sheet, if you prefer. *wink*) and less than ONE hour to complete my card. Yup. I totally counted that.

Happy Retirement (detail)


And now I am going to share ONE of my favorite things about Winnie & Walter stamps. If you collect the The Big, The Bold sets (and that's easy to do, as they release a couple here and there), you will find that you have a sentiment for ANY occasion. For REALS, you guys. It is actually hard to find an occasion for which these stamps will not provide exactly what you need. I mean, no...there's no HAPPY DONUT DAY or whatever, but - seriously - talk to Julie and Shay. They may just make it happen if you really want it. (P.S. Donuts are obviously on my mind this morning and that is sad, as I don't have any donuts.)

You can find links to the supplies I used on this card below. The links to Simon Says Stamp are affiliate links and your support is, as always, appreciated.

White Cardstock: Crafter's Companion Ultra Smooth White
Gold Cardstock: Bazzill Gold Metallic Cardstock (TOTALLY WORTH IT, YOU GUYS!!!)
Die: Winnie & Walter The Big, The Bold and the Happy Cutaway Dies
Stamps: Winnie & Walter The Big, The Bold and the Extras
Ink: Versafine Onyx Black
Puffy Stickers: Pinkfresh Studio Up In the Clouds Collection

Have a Happy!!!


1.21.2015

Have a Heart

We have a brand new challenge on the Simon Says Stamp Wednesday Challenge blog! Today we are bringing out the LOVE! The theme for the challenge this week is Have a Heart! We want to see hearts on your project somewhere! I played with some super fun new goodies for my card and I just love how this one turned out!

Sending You My Love


I am still loving this adorable Little Monsters set from Simon Says Stamp! Seriously, though, you guys. It is just TOO CUTE! I colored him with Spectrum Noir pens and mixed in a bit of paper piecing. You can find my complete supply list at the bottom  of this post. I then added a giant sentiment sticker and it is AWESOME! For reals, though, I love that sticker.

Sending You My Love (detail)


The design team is showcasing Wink of Stella and Glitter Ritz products this week and I've incorporated both on my card today! I added some clear Wink of Stella to the eyes and then coated them with Glossy Accents for a shimmering, shiny look. The glittery hearts are enamel hearts that I coated with Glossy Accents and covered with red Glitter Ritz glitter! SO MUCH FUN!


And now it's your turn! One lucky participant is going to win a $50 Gift Voucher to the Simon Says Stamp Store! That lucky participant could be YOU! Create a card based on the Have a Heart theme and link it up to the Simon Says Stamp Wednesday Challenge Blog for your chance to win! I can't WAIT to see what you create!

Here are the supplies used for my card. These links are affiliate links. As always, your support is appreciated! 


1.20.2015

Um, Excuse Me, I Believe You Have My Stapler

***Before getting started I wanted to announce the winner of my Season's Givings Giveaway! The winner is... Sandi! Congratulations, Sandi! Please email me with your full name and mailing address so I can get your prize out to you!***

Hiya! I am playing along with another fun challenge over on the My Favorite Things Card Challenges blog. This one is the color challenge.


These were the colors we had to work with. Fortunately, I recently got both the Tropical Teal and Persimmon ink, along with the tropical teal cardstock, so I knew I could work in a bit of limelight and lemon drop with what I had in my stash. I used the MFT Office Space stamp set (hence the blog post title...*wink* *wink*), with which I am, naturally, in love. I mean, FOR REALS! It has a Mac and a stapler in it! Why would anyone NOT want these stamps? LOVE!!!

Hold it Together


I used cardstock layers and strips to add a touch of color to the side of my design, while allowing the red...errrr... persimmon.... stapler to really stand out, framed by a pierced and embossed rectangle cut with Spellbinders Pierced Rectangles (yup...you can use just the piercing portion and skip the actual cut... LOVE that feature!!!).

I was surprised at how much I liked this color combination. I wasn't sure if I could pull it off, but I love the finished look!

If, for some reason, you are unfamiliar with Office Space, get thee to Amazon, my friend! Seriously...it's like $5. And you will understand my life to the greatest extent possible. HA!

...if they take my...my stapler, then I... I'll...I'll have to...I'll set the building on fire.

Have a Happy.


1.19.2015

Thanks a Latte!

You guys know I love a good pun. Or a bad one, to be honest. I just can't even HELP it! I decided to play along the the MFT Card Challenges Sketch Challenge and pulled out one of the fun punny stamp sets from MFT. And gold and white. Because gold and white.


I don't work with ovals often, so this sort of intrigued me. I pulled out the Pierced Oval dies from Spellbinders to serve as my base for the die cut image. I love those pierced dies. I seriously reach for them SO STINKING MUCH.

Thanks A Latte


This has a few layers, which was kind of fun, as I don't often work in layers. I stamped the cool triangle background (from Aha Arts)in gold Delicata ink and then added a cute puffy sticker border from Pinkfresh Studio. I {HEART} PUFFY STICKERS! For reals, though. I totally do. I then die cut the oval, added it with foam tape, die cut the cup, lid, and sleeve, added that with foam tape, and then heat embossed the sentiment in gold on vellum and wrapped it around the whole lot of it! Layers can be fun, guys!

Thanks a Latte (detail)


I have to be honest, I'm not usually one for sketch challenges, as working with a sketch just isn't my favorite thing in the world, but this one was very clean and simple in style and pushed me out of the box a little with the whole oval thing, so I jumped in. I am so glad I did! This card turned out super cute and was a lot of fun to create!

You can find links to the supplies I used below. Please note that Simon Says Stamp links are affiliate links and your support is appreciated. The other links are not affiliate, but I love this stuff, so check it out anyway! HA!

Cardstock: Crafter's Companion Ultra Smooth White, Bazzill Gold Metallic Cardstock
Vellum: Bazzill 40lb. Vellum
Dies: Spellbinders Pierced Ovals, My Favorite Things Coffee Cup die set
Stamps: Aha Arts Border and Pattern set, My Favorite Things Perk Up set 
Embossing Powder: Simon Says Stamp Detail Gold Embossing Powder
Tools: Milwaukee Heat Gun, EK Success Powder Tool, Spellbinders Tool 'n One
Ink: Tsukineko VersaMark Clear, Gold Delicata
Sticker: Pinkfresh Studio

Thanks for stopping by! Have a Happy!

1.16.2015

Birthday Wishes

Did you SEE the incredible inspiration photo for the Cure for the Monday Blues challenge this week? Oh, for the love of all things gold and shiny! I HAD to play along this time around. I simply HAD to do it.


And when I saw that, I also thought of the fabulous Sketch Challenge over on the Winnie & Walter Birthday Bash festivities, and well, my friends, it was just meant to be. I pulled these two bits of inspiration together to create a super fun card that I love super lots and uses a whole bunch of my favorite companies! WHAT?! Yup. Totally.

Birthday Wishes in Gold


I die cut some DCWV chalkboard cardstock (yes, they make that, yes, it's awesome, yes, you need some) using the pierced circle dies from Spellbinders which I have raved about so many times now, that I'm just assuming you own them, and then heat embossed some gorgeous Winnie & Walter stamps in GOLD! Because...gold. I stamped a simple heart with Gold Delicata ink to create that polka dot feel from the inspiration photo. LOVE!!! A bit of Bossy Joscie flair and May Arts ribbon add just the right finishing touch along with a puffy heart sticker from Pinkfresh Studio. (All supplies will be linked at the bottom of this post. That was a lot, I'm aware. HA)

Birthday Wishes in Gold (detail)


Oh...and gold cardstock. I seriously love that gold cardstock. I will be honest, it wasn't the cheapest stuff in the world, but I invested in a pack and I am using every SCRAP of that stuff! For reals, though. It's gorgeous.

Here is that supply list I mentioned (Links to Simon Says Stamp are affiliate links. Your support is always appreciated.)

Cardstock: Crafter's Companion Ultra Smooth White, DCWV Chalkboard Cardstock, Simon Says Stamp black
Stamps: Winnie & Walter Happy Christmas, Winnie & Walter a Tree for All Seasons, Winnie & Walter Picture Perfect
Dies: Pierced Circles by Spellbinders
Ink: VersaMark, Gold Delicata by Imagine Crafts/Tsukineko
Sticker: Up in the Clouds Collection by Pinkfresh Studio
Flair: Bossy Joscie
Ribbon: May Arts
Embossing Powder: Stampendous! Gold Detail
Tools: Grand Calibur Die Cut Machine, Milwaukee Heat Tool, Fiskars Stamp Press

Have a Happy!


1.15.2015

Planting Love and Groot, Yes, That Groot

Today I am SUPER DUPER EXTRA wicked excited to be on the Spellbinders blog showcasing a brand new and totally fabulous die from the Laced With Love collection called Planting Love. Here I am showing a fairly traditional use for this gorgeous die. I absolutely LOVE this tree! AND...the set comes with an entire plate of tiny hearts that you can add to the heart shaped tree. WHAT?! Yup. Totally fabulous, folks. For reals.

DSCN6740


I die cut the tree from Planting love several times from brown cardstock and then once from woodgrain paper from DCWV.  I then stacked the cuts to create a ton of dimension and depth for this die. I am SO IN LOVE with it!!!! I used various elements from the Pink Paislee Bella Rouge Collection, with which I am also in love. Seriously, though, you guys...awesome dies + awesome paper? What more can a crafty girl ask for?! A bit of May Arts silver string finishes off the design perfectly! And guess what? Yup. I totally love that, too. Are you feeling the love yet? 'Cause it is all up in this blog today.

HAHAHAHA!!!! I totally just said that. *sigh* That was hilarious. Okay...moving on, for reals, though...

Love Ya (detail)


This shot shows that depth from the stacked cuts. I so love this look. If you  haven't tried it yet, you simply MUST. It has such an awesome impact on the simplest of projects!

BUT, my friends, that's not ALL this gorgeous Planting Love die can do, oh, nosiree, BOB! It can also be Groot. Yes. That Groot. THE Groot.

THIS crazy, baby, bobble-headed, dancing in as pot Groot.

Groot Sneak


Wanna see more? Wanna know how I made him? Well, then I suggest you venture on over to the Spellbinders blog and check out that tutorial, my friends! Don't forget to leave a little love while you are there!

You guys rock, you know that, right?

Have a Happy!


1.14.2015

It's A Guy Thing


Welcome to Wednesday! It's time for a new Simon Says Stamp Wednesday Challenge! This week is all about the boys! The challenge is It's A Guy Thing! The design team is featuring Tim Holtz products. You don't have to use them, but if you have them, we would love to see what you do with them! I decided to pull out the Tim Holtz Watercolor Paper to create a fun background on this one.

Wishing You the Happiest


I absolutely LOVE this die from My Favorite Things! I combined it with a fun sentiment from Simon Says Stamp for a simple masculine card. Yup. You can watercolor on guy cards. I promise. LOL!

Wishing You the Happiest (detail)


And now it's your turn! Create something inspired by the It's a Guy Thing theme and link it up over on the Simon Says Stamp Challenge blog! One lucky participant will win a $50 Gift Voucher to the Simon Says Stamp store! Woot! Woot!!!

Supplies:
Watercolor Paper: Tim Holtz
Stamps: Simon Says Stamp Sending and Wishing
Friend Die: My Favorite Things
Watercolor Paints: Zig Kuretake Gansai Tambi 
White Pen: Uniball Signo


Links on this post are affiliate links. Thank you for your support!

1.13.2015

Don't Quit Your Day Dream

Oh. My. Goodness. Have you guys been following the pictures folks have been posting from CHA? If you haven't simple search Facebook/Instagram/Twitter for the hashtag #cha2015 and you are bound to find LOTS! Also, Yana has compiled videos showcasing the booths and the new products right there at the show! You can find those HERE!

Pinkfresh Studio is showcasing their brand new Up In The Clouds collection that is soon to be released!!! It is an absolutely GORGEOUS collection. As a design team member, I was lucky enough to get my hands on it early and will be sharing some projects with it here on my blog.

Don't Quit Your Day Dream

This collection is new, fresh, and totally fun. I love how it is such a unique collection, but yet totally on trend at the same time. Gold, anyone? Yup. LOTS of gold in this one! And did you SEE those cute puffy stickers?! *sigh* I am in love.

Don't Quit Your Day Dream (detail)

I layered a piece of vellum over the gold foiled card to make it a bit more subtle on the background pattern and then used the rubon sentiment directly on the vellum. These COLORS! You GUYS! For reals, though...I love them so much. SO. MUCH.

ALSO...we will be showcasing the brand new Pinkfresh Studio monthly embellishment kit soon! These kits are AMAZEBALLS! They include all sorts of embellishments and even have dies in them! WHAT?! Yup. Totally, you guys. You can subscribe now to get in on the very first kit! I am telling you... fun, fresh, unique embellishments that totally ROCK! Do it.

Have a Happy,folks!

1.12.2015

Because Hugs and Kisses

I am up over on the CAS-ual Fridays Stamps blog today with this fun card! I used the brand new Mwah! Stamp set for this one. I simply stamped the sentiment and then masked off a heart shaped area to stamp the x's and o's. This was super fun and not hard to do at all!

XO Mwah


I used a circle punch to add notches for the string to add just a little something extra. I love how the cardstock color peeks out from behind the notches!

XO Mwah detail


Be sure to head on over to the CAS-ual Fridays Stamps blog for lots of super cute inspiration!

Have a Happy!

ShareThis