7.30.2010

It's Linky Day!!! And....apparently it's me chattering randomly day, too. Just say'n.


Sanuks. I love them. Mind you, I don't own any, but I've been trying to convince The Hubbums to get this particular pair for some time now. You see, we have a little problem. I think they are totally cute and would look TOTALLY fabulous on him. He, well, doesn't. The thing of it is, though....
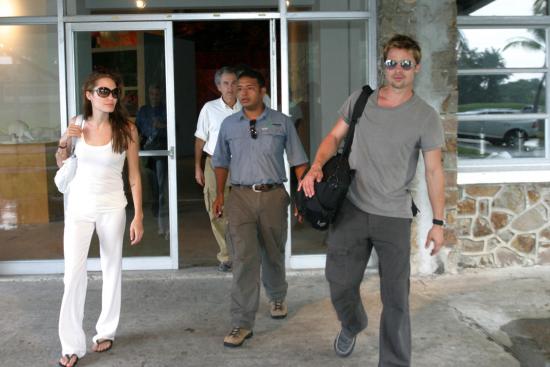

Brad wears them.

Yup. So they MUST be cool, right? HA! No, but for reals. He does dress well and so does The Hubbums and I totally think he needs them. The BEST part is...the other day we were wandering around Patriot Place poking into a few stores after a yummy lunch at Five Guys (I {heart} Five Guys) and he stopped to LOOK AT THEM!!! This many not seem like a big thing, but you have to understand. This is not just ANY guy. This is THE HUBBUMS. The man is quite particular about his clothes, the fit, the fall, the fabric, all of it. It MUST be right. And ... I think he may be considering shoes that I have been trying to convince him would look fabulous on him for months now! It's the little things, folks. It's the little things.

Does your man wear Sanuks? Is he hot? Is he super into fashion and always looking for the perfect fit? Just curious.

ANYWAY....I'm exhausted because I stayed up too late to watch Project Runway. It was pretty good, though, so I can't complain too much.

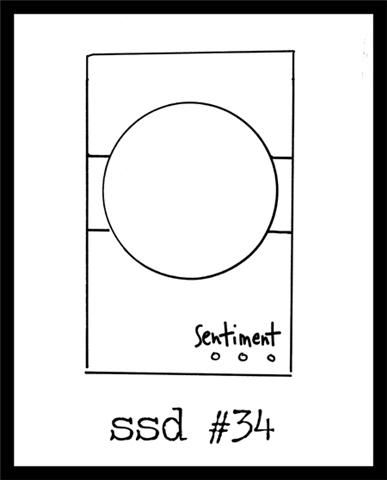
Now, what did YOU create this week? Did you bake something fabulous? Make a great dinner? Sew up something spectacular? Piece together P..... ummm...a really cute layout or card? HA!!! Yeah, the alliteration sort of ran out. Anyway, you can link up to ANYTHING as long as it was made by YOU and preferably posted this week. Please limit your links to blogs and photo galleries - no shops, please. And don't forget to visit the other links, too! It's all about sharing the love, dudes. All about sharing the love.

AND...the Winner of the TOMBOW giveaway is Theresa at Faerie Moon Creations!!! YAY!!!

7.29.2010

Everything Happens if you Just Pretend - A Mixed Media Painting

Yup. There you have it. I said it.

Painting.

Yikes! That's scary! And it is even scariER that I am about to share that with you! You see, I am a very artsy kinda girl. I'm fairly good with my hands and I have a lot of great ideas. HOWEVER...those skills ARE limited! I don't draw and I don't generally paint. I'm afraid of it and I don't really want my work to look like that of a kindergarten student. Just say'n.

BUT...after reading Life Unity and Everyday Bliss (two AMAZINGLY inspiring people!), I was left with one thought looming over me.

I must face my fears. I MUST do something that scares me.

It was that simple. So, with that, I created the following 5x7 Mixed Media Painting. The thing is...I am BEGGING you to be honest. Nice, mind you, but honest. I know I need to work on the eyes...that is for sure, but what else can I do to bump this up to the next level. I found that I really enjoyed the process (which is why I'm sharing step photos here!), but I want to be GOOD at it! LOL! SOOOooooo....that means that I'm basically asking for free lessons from my talented readers! HA! Tell me what you think! Tell me how to grow! No...for reals. Just do it. (Am I allowed to say that? Is it like copyrighted or something? Hmmm...Nike, please don't hunt me down and sue me. Thanks. It's appreciated. Just say'n.)

So....enough putting off the inevitable, here you go...

Sketch for Everything Happens...


I began with a sketch... you know, that whole drawing thing that I DON'T DO!!! HA! And then I outlined it with a fancy schmancy art tool - yup! It's totally a Sharpie! Those things make me happy. Just say'n.

Everything Happens - painting started


Then, I was totally intimidated by the layers of color and the fantastic 'thick-paint' texture that I see on others' work. I had no idea how they got that. BUT, I had to try, so I mixed a few shades and just sort of glopped them on over each other and I got exactly the look I was going for! It's not perfect, but it's still really cool and looks like maybe someone knew what they were doing for a minute or two! HA!

Everything Happens Painted


I decided on a blue toned dress and a blonder hair color. I even managed to create a skin tone I was happy with!

Creating the paper background element


To create the background I used a handmade paper (not by me) torn to bits and then layered over tissue paper where I had traced my image so I could later cut out the pieces needed for my background.

Background for Everything Happens...


This was pretty much crazy fun! Just say'n.

Everything Happens... in progress


I added the background to the canvas around the painted doll.

Everything Happens...


I then added the text and the embellishments to the piece.

Everything happens...dress


Evertying Happens Face


And here she is!!!

Everthing Happens If you Just Pretend


So, tell me what you think. Off suggestions....I'm listening! I promise!

I am joining the following parties:

giveaways
HookingupwithHoH

7.28.2010

What's on MY Workspace? Good Question! HA! And a GIVEAWAY!!!

***GIVEAWAY CLOSED***

Well, we are back in town and after a week with the Hubbums out of town and then an immediate whirlwind unexpected trip to Denver over the weekend, it's been a little nutty! I haven't had a chance to work on anything new, really, but I did make a little progress on this tiny doll that I started. It's going to be one of those ones that I work on here and there, as my vision for it seems to be coming in pieces, rather than in a whole finished product kind of way. These always end up so interesting!

WOYWW - 28 July 2010


Other than that, this is what my desk looks like:

WOYWW 28 July 2010


The usual mess and a puppy toy that is currently in the 'puppy toy hospital' as it got torn and this is a favorite, so I'm going to stitch it up. (Or, perhaps just take a trip to IKEA to get a new one, seeing as they are $2 and the other one already got 'disemboweled' so to speak. Just say'n.)

I also wanted to extend a HUGE welcome to those of you who are visiting from the Tombow blog!!! I am so excited to be sharing over there and so excited to see some new faces over here! Leave a comment and I will make a point to come visit your blog if you have one! You can also find me on Facebook (see sidebar) and Twitter!

Also, because Tombow is AWESOME! They are allowing me to give away here on my blog my THREE favorite adhesives! The Classic Mono Adhesive Roller, the Powerbond Mono Adhesive Roller AND the Mono Adhesive Glue Pen! Oh, and that's not all, folks! They are also going to throw in a set of the Manga markers that I have been using and loving SO much! Just leave a comment on THIS post to be entered! And...the BEST part - they are doing the SAME giveaway on THEIR BLOG, too! So check it all out!


OH!!!! And if you didn't see it already you totally have to check out my last post for Wordless Wednesday because I got to go to Bliss Cupcakes in Denver and I had a SUPER yummy Pistachio cupcake that made me SUPER HAPPY!!!!! Go see! You know you wanna! (P.S. I {heart} cupcake shops. Just say'n.)

To see some more fabulous workspaces head on over to The Stamping Ground!

Bliss Cupcakes : Pistachio Goodness {Wordless Wednesday}

Yup. It was awesome. Just say'n.

Bliss Pistachio Goodness


For More Wordless (or almost wordless) Wednesday posts check out here and here!

7.27.2010

It's Skipping Stones Design BLOG HOP time!!! (SSD #35)

You know what that means!!! Lots of fabulous inspiration and perhaps even some prizes! Plus, join in and create a card for the sketch!!!!!

Welcome to Skipping Stones Design’s Blog DT Blog Hop to celebrate the release of two new stamp sets, ""Friendly Fruit" and "Timeless Textures" If you came here to my awesome blog first, you’ll want to go back to the beginning at Skipping Stones Design. You should have arrived from Michelle's blog. That way you can see ALL of the fantastic-ness!!!

Combined with the blog hop today, it's also Skipping Stones Sketch Tuesday which means the Design Team is showcasing another great creation from Kim Kesti. We'd love for you to play along with the sketch. Just remember to use the keywords SSD035 if you are uploading to any online galleries or link your card at the Skipping Stones Blog. We'll be looking soon for Guest Designers and a DT calll soon will be going out so you never know....

Here is my card for this week! I used one of my favorite sets! It's called Dandelion Dreams!

SSD#35 Happy Birthday Card


Now, head on over to the other blogs to see what the rest of the Stamp Tramps created!!!

Skipping Stones Design
Kim Kesti
Erin Grotegut
Peggy Russell
Kandi Phillips
Dina Kowal
Michelle Giraud
Jennifer Ingle
Heidi Van Laar
Amanda Sewell
Chelsea Van Wyk
Angela Thomas

Today I am linking with the following parties:

All Thingz Related

7.26.2010

Some Fabulous Stuff Going On...

Well, I'm actually traveling today, heading back home, but I wanted to give you all a quick heads up on a couple of exciting things!

First of all , I am REALLY excited to tell you that I am the guest designer over at Tombow this week!!! So please head on over to their blog and check it out!!!!


Also, Skipping Stones Design is having a FANTASTIC SALE! Here are the details:

The P.M.S. sale is back!!!!
P.M.S. sale~ the more you buy the more you save!!!!
P.M.S.~ in this case~suffering from the NEED to Purchase More Stamps!
Here is how it works:
Buy 1 stamp set save 5%, Coupon code: PMS1
Buy 2 stamp sets & save 10%, Coupon code: PMS2
Buy 3 stamp sets & save 20% (total savings $8.70) Coupon code: PMS3
Buy 4 stamp sets & save 25% Coupon Code: PMS4
for a total savings of $14.49 ~that's like getting one FREE
Buy 5 stamp sets & save 30%, Coupon Code: PMS5
for a total savings of $22.10 ~that is like getting 1 FREE and another one half off!!!

What to do: Put the stamps into your shopping cart as normal. When you are checking out there will be a box where you can type in a coupon/discount code. This is where you type the letters PMS and the number of stamp sets you purchase. For example if you are buying three stamp sets type in PMS3 into the box.

*This sale will last until Monday August 2nd at midnight

More Great NEWS!!!!

And...for the two new stamp sets BARELY RELEASED....
You can PRE ORDER them starting TODAY, and they will ship on TUESDAY!!!
Plus, they count toward the sale that starts TODAY~~~
Here's another look at our AMAZING NEW sets:
4X6 Friendly Fruit:
4X6 Timeless Textures


I hope you have a fabulous Monday! I will be flying back into town so I hope to see you all tomorrow!

7.23.2010

Fabulous Friday!!! Polymer Clay Flower Pendant Tutorial and YOUR PROJECTS Linky!!!

I wanted to share this fun and simple pendant that I created with all of you! It's really not difficult at all and I LOVE the finished product! All you need is a block of Sculpey clay and a bail! Oh....and an oven. An oven definitely helps. Just say'n.

Polymer Clay Flower Pendant Step 1


After working with the clay for a bit to get it nice and soft and workable, roll several small oblong-y solids. (Yes, I know I could have said balls, but my version is more fun!)

Polymer Clay Flower Pendant Step 2


Next, squish 'em! Yup! Squish them into little petal shapes. You can pinch one side just a bit to get the desired form.

Polymer clay Flower Pendant Step 3


Layer the pinched ends together and press gently to make them all stick to each other. (Yes, I realize this is a highly technically worded tutorial. WHAT DO YOU PEOPLE WANT FROM ME! HA!)

Polymer Clay Flower Pendant Tutorial Step 4


Make some smaller oblong-y solids and squish those and add them as the next layer. Do this until you are happy with the number of petals you have on your flower.

Polymer Clay Flower Pendant Step 5


Roll ONE spherical solid (also known as a 'sphere.' Technically speaking. Just say'n.) and squish it but good to create the center of your flower. Add it to the flower. In the center. (That's the middle.) HA!

Polymer Clay Flower Pendant Step 6


Finally, add your bail and bake at 275 for about 25 minutes or so (or by the manufacturers instructions printed on the clay package).

Isn't that just SUPER CUTE and SUPER FUN? It is. I promise. NOW, it's YOUR TURN! Show us what you made this week by adding a direct link to your post below. The link should NOT be to a shop - only to blog or flickr type posts. You can post ANYTHING made by you! Baked, paper crafted, painted, mix media-ed, crocheted, knitted, quilted, pieced, sculpted, or WHATEVER! Please spread the word about my little Fabulous Friday linky party so we get lots of projects and LOTS of inspiration! (Tweet, Facebook it, blog it...whatever! Thanks!)

7.22.2010

Salted Monkeys? Maybe, but at the very least it's some REALLY good Cupcake Porn!

DSCN6398


So, do I have your attention yet? Yup. They are pretty much amazing. Just say'n.

To be 100% honest, they were a bit of dumb luck. I had a few ideas swimming around in my head and decided to go ahead and give them a shot. Well, it WORKED! These are super stinking yummy! For reals! Super Yummy. Just say'n.

Salted Monkey Cupcakes


And, just because I knew you would ask, I actually remember to write down what I tossed in there so I could share the recipe with you!!! Yay!!! The only thing is, if you make them and share them online, please link back here! I actually came up with this one on my own, so I'm kinda proud of it. LOL!

Salted Monkey


One thing you should know...I'm a doctor-er. (I am fully aware that doctor-er is not a word and I'm okay with that. It works for me.) Anyway, as I was saying, I am a doctor-er. Meaning, I actually started with a mix and then created my own flavors from there. You could just alter your favorite yellow cake recipe if you would like. I thought about doing it that way for about ten seconds, but then I realized that that took more time AND money, so I stuck with my doctoring plan. Just say'n. So...here it is:

Ingredients:
1 Box Yellow Cake Mix (get one that is super moist - they really are better)
2 medium slightly over-ripe bananas (as in, nobody's going to eat them, but they aren't like liquefied or anything gross like that)
3/4 c milk (I used skim)
1/4 c Canola Oil (I suppose you could use any vegetable oil. Actually, if you want a strong, full flavor, you could even use a light olive oil for these)
1 1/2 tsp. almond extract
1/2 tsp. vanilla extract
Some Allspice. (Yup. I forgot to measure it. I think it was about a tsp. or so.) Just make it smell good. HA!

Frosting:
1 can of packaged whipped cream cheese frosting
1 tsp. almond extract
1 bag Planters Sea Salt and Olive Oil Almonds (Well, really you only need about half the bag or so, but you will want to eat the rest. They are SUPER yummy!)

Mix the cake ingredients until very well blended. (Make sure your bananas are mashed up and mixed in.)
Pour into lined cupcake tins (3/4 full)
Bake at 350 for about 20 minutes or so. You can do the toothpick test on these.

Mix the tsp. of extract into the cream cheese frosting thoroughly.
Smash up a large handful of almonds.

After the cupcakes cool, frost them with the frosting and sprinkle a generous amount of crushed almonds on them including the dust.

Salted Monkey Cupcakes


Enjoy!

I think I am calling them Salted Monkeys, but I'm not sure yet. What do you think? Good name? Any other suggestions? I'd love to hear 'em!

I am joining the following parties:

giveaways
HookingupwithHoH

7.21.2010

A little happy in my studio.... (Wordless Wednesday)

Happy Colors


For more WW posts check here and here!

Also, don't forget to check out the post below, also posted today! I've been working on some fun stuff!

Gold Medals, New Adventures, and Cute Little Randoms

Well, this week I've had some extra time to create and that is always fun, but sometimes it lends itself to pure and utter RANDOMNESS! For reals, people. I don't even know where this stuff is coming from! HA! Here is my workspace right now (okay, well, last night when I took the photo)...

WOYWW 21 July 2010


Yup. There is a lot happening there. You can see the gold medal in the center. That was a request from The Hubbums. Noooo....he doesn't need me to give him a medal for being the best Hubbums in the world, you crazies! It's for a student. The fun of being married to a teacher is that you get random 'can you make this' requests from time to time! HA!

Here it is finished:

Gold Medal


The other things you see there are a little adventure I decided to dive into. Yup. Painting. I've been scared to death of it, but I decided to give it a shot because of that very reason. I'll share the finished piece tomorrow. It isn't quite done yet in this shot.

AND ... you can see a doll in the concept stage. She has a LONG way to go, but she is coming together in my head. Slowly but surely.

Slide Pendants


Finally, these are two little pendant type things I worked on last night. Obviously they aren't dry yet in this photo. I think I am going to make them pendants, as they are double sided. I love the holiday images on them! They make me smile!

Halloween and Christmas Pendants Side B


I just don't know what kind of bail to use on them. I'll figure something out. Anyway, that's what's on my workdesk right now! To see some others check out The Stamping Ground!

Also, don't forget to check out my Wordless Wednesday post above this one! Thanks for leaving a comment! I need them this week!

7.20.2010

What's a Great Gift Box Without A Great Gift? (SSD #34)

It's Tuesday and that means another fun project with Skipping Stones Design and a new sketch for you to play with, too!!! Here is this week's sketch created by none other than the fabulous Kim Kesti!
It's a pretty great sketch, actually.  Just say'n.  I mean, I kinda love it. 

Instead of going with a card this week, I decided to create a fabulous little gift box! I used the Healing Wings set on the box. I stamped the image and the heat embossed it in gold. I then melted the tips of crayons with my heat gun and used the soft wax to fill in portions of the image. This was a really fun technique! Just one of those crazy ideas that I get from time to time! HA!

Butterfly Gift Box SSD #34 (A)


Butterfly Gift Box (B)


And, I really don't think it is fun to have a gift box, even a super duper pretty one, without a GIFT inside! So, I created a little necklace to go inside my box!

Fabric Fan Necklace


It is a fabric fan necklace and it is super cute! I kinda love it, actually. It's for someone special! I hope she loves it, too!

I'm also wicked excited about a project I started last night! It's something new for me and it is something that I was afraid of and decided to just jump in and try! I am loving it! So fun! I will share it with you when I finish it, but it may be a couple of days because, well, it has to speak to me for one last thing and it hasn't done that yet. It will, though. They always do.

Don't forget to check out what the other SSD DT Stamp Tramps have created!

Beautiful Greetings
Sparkle and Bling
Krafty Kandi Krafts
Scraptastic Voyage
Inky Smiles
INKSPIRATIONS
Twisted Chick Creations
Skipping Stones Design

Today I am linking with the following parties:

All Thingz Related

ShareThis