Showing posts with label dry embossing. Show all posts

1.10.2023

British Ducks and Whatnot

 Did you know that was a thing? There are British Ducks. No, really. Very. British Ducks. I didn't know that until I went to London over Christmas, where I met the most British duck I've ever seen. Here... let me introduce you....


There she is. Tell me she is not the most British duck you have ever seen. And, yes, she lives in the Queen's Gardens. And she is lovely. I did not take her home. but I sure did want to do so.

All that to say, ducks are pretty fun. and this new SUPER cute duck die set from Spellbinders is no exception to that!


Ummm... seriously, though! I used an amazing new raindrop 3-D Embossing folder for the background along with blended distress inks and then pieced together the adorable duck, giving him sparkly red rubber rain boots and a sparkly rain cap along with a red umbrella. 


The sentiment die is from the new Raining Hearts Etched Die set and I love it! I stacked it three deep to give it a bit of structure and dimension. And... because I borrowed a couple of the child's rubber ducks for this photo shoot... he insisted on being in a shot with them.


He's a pretty cute little duckling, himself, if you ask me! HA! 

So, head on over and check out the newest release from Spellbinders and spend your day contemplating the nationality of ducks. If you do those two things, I promise you will have a wonderful day. You truly will!

Have a good one!

9.15.2015

A Real Splash!

Simon Says Stamp has added a new company to their shelves and I think you are going to LOVE these stamps! Pink & Main offers a seriously fun variety including graphic patterns, cute stuff, and basically just FUN stamps!

A Real Splash! by Jennifer Ingle #JustJingle #SimonSaysStamp #PinkAndMain #Cards


I used the absolutely adorable Mermaids stamp set to create this fun little card. I couldn't help making the fish yellow and blue. I just. couldn't. help. it.

A Real Splash! by Jennifer Ingle #JustJingle #SimonSaysStamp #PinkAndMain #Cards


I masked the fish and then did a simple line mask to do ink blending to create the water and the sand. I used a variety of distress inks to get that look. I then used pigment inks to stamp the coral and the plants. I love how pigment inks sit on top of dye inks so you can create layered scenes like this! I then used Copics to color the fish.

Thanks to Simon Says Stamp for sending these super cute stamps my way to try out! I love them! You will be seeing more from them around here! I promise!

You can find my complete supply list below. All links are affiliate links and your support is very much appreciated!

Supplies:

Stamps: Pink & Main Mermaid Clear Stamp Set
Embossing Folder: We R Memory Keepers Chevron Embossing Folder
Ink: Ranger Distress Ink, Momento Tuxedo Black, Momento Luxe Morocco, Avery Elle Jungle
Markers: Copic
Tools: Tim Holtz Mini Distress Tool and Foam Circles, Milwaukee Heat Gun

12.01.2014

Spellbinders® Winter Sneak Peek and GIVEAWAY! - Day 2


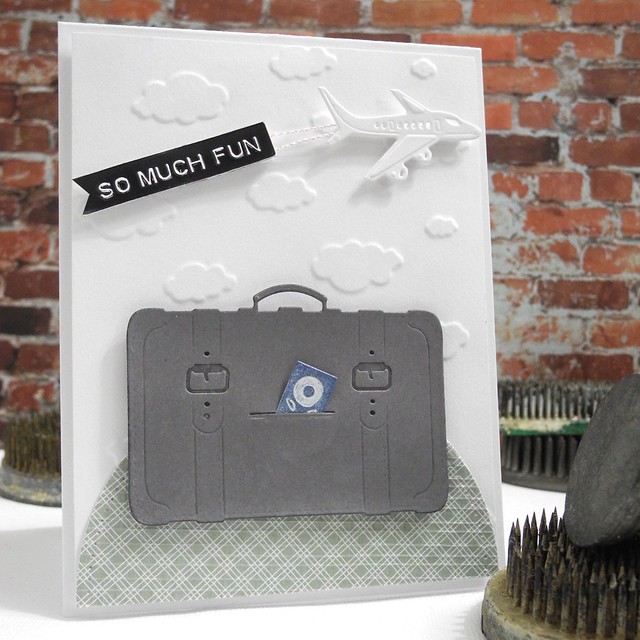
It is SNEAK PEEK time over at Spellbinders® and we are EXCITED! We have some AMAZING new releases coming out at CHA and I am excited to give you a quick peek at two of those great die sets today! The Around The World set and the International Luggage dies are SO MUCH FUN, you guys! For reals! I love these dies! They are great for CAS designs, Shabby Chic designs, vintage, layering...you name it! Seriously... they are super fabulous. For. Reals.

First, I am going to show you how I created this super fun card!

DSCN5944


Spellbinders® Supplies:
Cross Promotional Partner Supplies:
Other Supplies:
  • Ink: Blue Denim
  • Chipboard
Instructions:

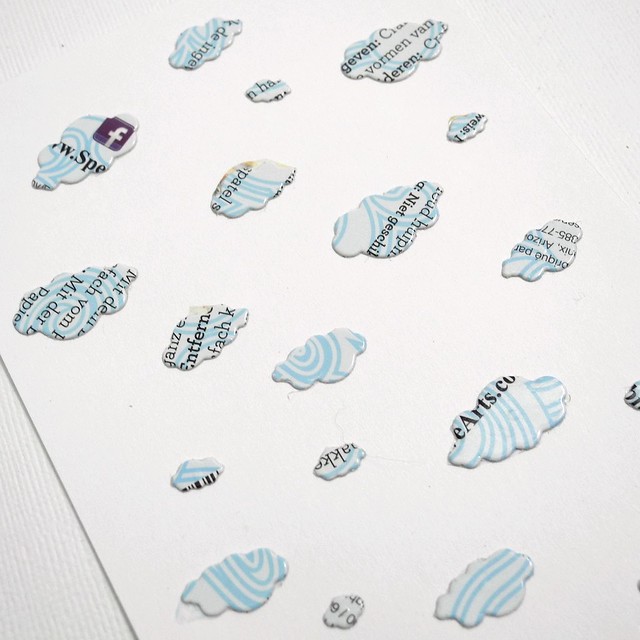
1. To create the cloud background on this card, I used dies to create an embossing plate. This is a super easy technique, that makes your dies even MORE versatile! LOVE THAT! To create the plate, cut a cardstock panel and then die cut the clouds repeatedly from chipboard (I used old product packaging for mine.) and adhere them to the cardstock panel.

Step 1


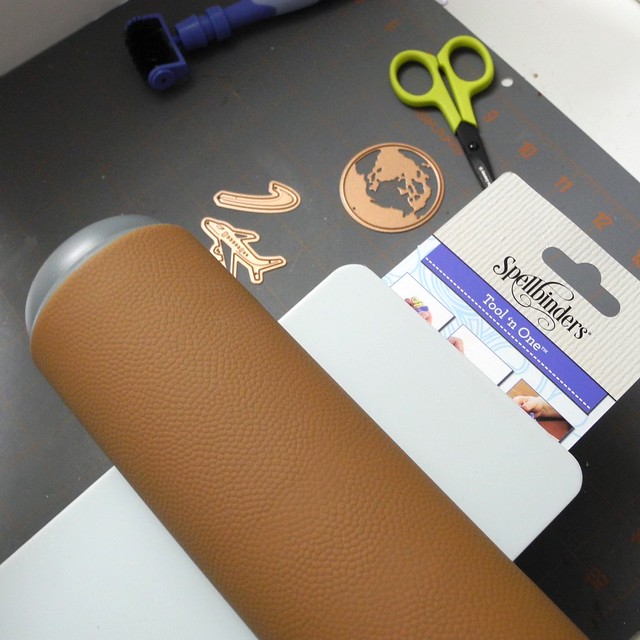
2. Create a sandwich in your die cut machine as you normally would for an embossing plate to emboss.

Step 2

3. Die cut the suitcase, airplane, and passport. ink the passport and insert into suitcase 'pocket', adding adhesive where needed.

4. Die cut circle, using both the cut die and the piercing die, from the textured paper and adhere to embossed background.

Step 5


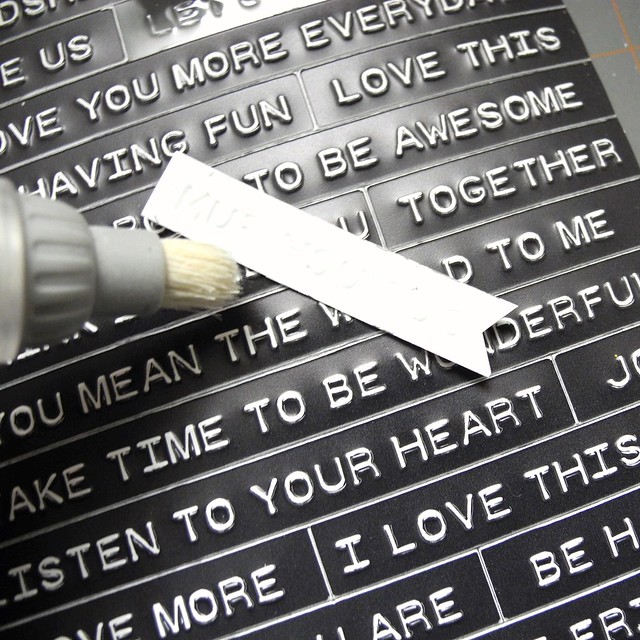
5. Brush powder or cornstarch to the back of sentiment sticker. Using foam tape, adhere string to sentiment and to airplane die cut. Adhere to card with the foam tape.

6. Adhere suitcase with passport to the panel using both a tape runner and foam tape as needed. Adhere panel to card base with foam tape.

I love how cute this card turned out and I can use my custom embossing plate again and again! It is always awesome to get the MOST out of supplies! LOVE IT!

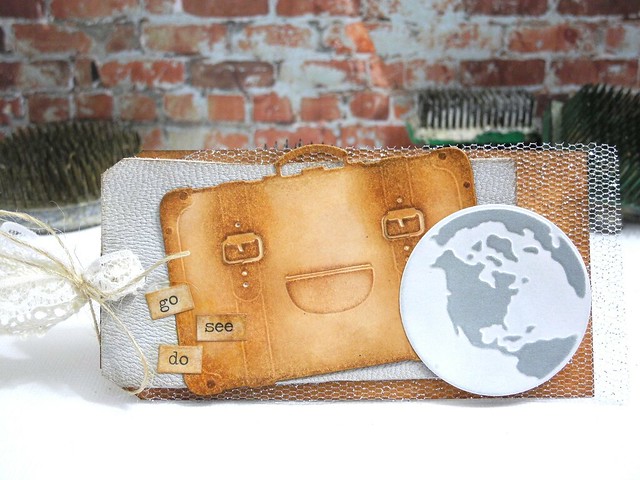
AND... to show you another direction you can go using these same die sets, I created this fun shabby chic luggage tag! LOTS of layers on this one! I used some basic tags along with leather and fabric pieces from the A Gilded Life line. If you haven't checked those out yet...dude... DO IT!

Go See Do Luggage Tag

GIVEAWAY TIME!

You have the chance to win some of the AMAZING new dies I used on my projects today! To enter, CLICK HERE and fill out the entry form. You can find the complete giveaway rules here. 

If you have any questions regarding the giveaway or our sneak peek week, you can contact Spellbinders® by email. No contest entries submitted via this email will be accepted. Please use the entry form only to enter the giveaway.

Be sure to head on over to the Spellbinders® Blog for more inspiration and details on our Winter Sneak Peek and Giveaway! Also, Linda Duke is sharing another FABULOUS project on her blog today, so be sure to head over there, as well!

Have a Happy!


6.05.2014

2 Cards, Similar Products, Similar Design

Sometimes I like to get a couple of cute cards made without spending a super ton of time on them. Other times, I HAVE to get a couple of cute cards made without spending a super ton of time on them. HA! That being the case, I have found a few tricks along the way to allow me to achieve that goal. Using similar products and a similar, basic design can help you to create unique cards that stand alone beautifully, but come together rather quickly.

Hello Flower


Hello Flower (detail)


When I first saw these amazing Triplits dies designed by Stephanie Barnard for Sizzix, I knew I HAD to have them! They offer SO many possibilities. You can cut the pieces you need and layer them as you wish, offering endless variety and flexibility! LOVE THAT! For this card I paired the Triplits Flower die set with an awesome new embossing folder from The Stamps of life. I kept the design simple, added a bit of twine, and layered colors and a bit of wood for texture and interest. I love this card. It is happy making.

Leafy Miss You


Leafy Miss You (detail)


And then I made THIS card! Because I used the same type of supplies, along with a similar layout, this one came together SUPER fast! For this one, I used the Triplits Leaf die set and another awesome embossing folder from The Stamps of Life. Instead of twine, I went for a burlap string for a more natural look.

So, there you have it! Two cards, similar products, similar design all coming together to make fast and easy work while also still being WAY fun! Please find my complete supply list below.

Stamps: formalwords2stamp by The Stamps of Life
Embossing Folders: Elegant and Regal Embossing Folders, and Royal and Flower Burst Embossing Folders from The Stamps of Life
Dies: Triplits Flower Dies, Triplits Leaf Dies from Sizzix
Twine: The Twinery
Burlap String: May Arts
Ink: My Favorite Things
Die Cut Machine: Big Shot by Sizzix

Have a Happy!

4.24.2014

Another Butterfly Card

I told you guys I loved these butterflies, right? Because I totes do, dude. And I also love this embossing folder. Crafter's Companion goodness at it's best, folks! LOVE! The stamp set I used on this one is called True Colors and I paired that with the gorgeous Make a Wish embossing folder.

Butterfly Birthday


I colored the image using Spectrum Noir blendable colored pencils (90, 98, 102, 062, 063, 055, 002, 041, 036) on kraft cardstock. I love how the pencils look on the kraft! It's also a good chance to use the white, which is always welcome. HA!

Happy Birthday Butterfly (detail)


Be sure to check out the Crafter's Companion Facebook page for daily inspiration!

Have a Happy!

3.21.2014

Well, That's Just Ducky!

Sometimes I choose stamps simply based on their LOA.  What is an LOA, you ask?  Well, that would be the Level Of Adorableness.  Yes.  That's totally a thing.  HA!  It has nothing to do with filling a genre I need more of or finding the perfect stamp for an upcoming project...nope... sometimes it is all about the LOA.  That, my friends, is how this super cute Souffle the Duck stamp set from Crafter's Companion came into my life.  Seriously, you guys.  That is a pretty high LOA on that little duck.  For reals.

Ducky Hello


I did a bit of paper piecing using some fun papers from the Fancy Pants Designs Memories Captured 6x6 pad.  I love these papers!  The cardstock background needed a little something, so I dry embossed it with the Petite Dot embossing folder from Crafter's Companion.  I love how much that adds!  The sentiment is a fun Lawn Fawn die.

Hello, ducky!


I had fun with this one!  Be sure to check out the Crafter's Companion Facebook page for lots of great inspiration!

Have a Happy!

...Perhaps a Very DUCKY Happy today! (Afterall, today is the first day of the year the Boston Duck Boats hit the roads/river!  And that, my friends, is your random fact of the day.  You are very welcome.)

3.04.2014

Emboss it. Emboss it Real Good.

Yeah... that title.  Not so sure it works.  Whatevs.  I'm going with it.  SO...here's the deal.  Crafter's Companion is releasing some BRAND NEW embossing folders today and they are AMAZING!!!!  Seriously, you guys.  These are GORGEOUS!


I used the super pretty Spring Morning folder on my card for today.  I simple embossed white Crafter's Companion cardstock (my personal fave) with the folder then added a bit of gold ink to the raised portions.  It's shimmery and happy!  YAY!

Just Because


The sentiment is from the Souffle's Sentiments set.  Trust me.  You will be seeing more from that adorableness soon!  SO CUTE!

Just Because (detail)

Head on over to Crafter's Companion to check out the other new goodies along with the big BIRTHDAY SALE they have going on!!!  Yup.  Discounts, people.  Discounts.  AND...there are also a couple of great giveaways going on (as in... full set of Spectrum Noir markers kind of great) over on the Facebook page, so check that out, too!

Have a Happy!

2.13.2014

Awesome New Embossing Folders from Sheena Douglas

Hello, friends!  My giveaway over on my Just Jingle page on Facebook will remain open until sometime tomorrow!  Be sure to head on over for your chance to win TWO free CAS-ual Fridays Stamp Sets!  Woot!  Woot!

Today I have a gorgeous card to share with you and it is all due to one of the amazing new embossing folders designed by Sheena Douglas for Crafter's Companion.  I LOVE this folder!  It is so detailed and so pretty!  I decided to use it as the primary focal point for my card.

Architectural Birthday


Isn't that just awesome?  I love it.  The folder just stands alone so beautifully!  AND... what you can't see in this photo is that I sprayed the entire card before adding the simple sentiment from the Memories are Made Sentimentals set with iridescent glitter spray!  So pretty!  Just a bit of shimmer and sparkle!  I do so love shimmer and sparkle!

Architectural Birthday (glitter details)


Be sure to head on over to Crafter's Companion to check out the entire range of new embossing folders!  There are some really pretty ones in this new mix!

Have a Happy!

12.12.2013

Jingle All The Way

Today is a bit of a bittersweet post, as it is my LAST post for Newton's Nook Designs!  I have SO enjoyed being a part of this fantastic design team and I hope you have enjoyed the projects I have shared along the way!  Jen has been a joy to work with and I can't wait to watch her company grow from the sidelines!  I figured it was only proper for me to pull out the Jingle stamp from the Holiday Wishes set for my final card!  I mean, really... it just makes sense!  HA!

Jingle All The Way


I also used the super pretty ornament string from the same set.  Actually, to be honest, I've been dying to ink up that stamp, so that's what I started with and the rest of the card sort of took off from there.  I love how this one turned out!  It is done with my favorite color, red, it has a bit of sparkle on the roofs of the houses thanks to my trusty ol' Wink of Stella brush pen!

Jingle All The Way (detail)


I colored the ornaments with Spectrum Noir pens and added a bit of sparkle with my Wink of Stella to those, as well.  I used a silver gel pen to add silver to the ornament hangers.  I would have used a silver Wink of Stella, but I don't own one yet... in time, my dear friends, all in due time!  *wink*  *wink* The embossing folder is the Beach Huts folder from Crafter's Companion. I have decided it's a Christmas embossing folder and I don't care who wants to argue that point. It is. That's final. For reals, though...it is a SUPER cute one for Christmas!!!

Jen has written a wonderful little post including some of my cards over on the Newton's Nook Blog today, so be sure to head on over there to say hello!  Thanks for being awesome!

Have a Happy!

P.S.  Did you know that Simon Says Stamp carries Newton's Nook Designs stamps now?  Ummm... YUP!!!  So be sure to add some on to your next order!  They are super fun!!!


12.11.2013

Let it Snow!


On paper, that is.  ONLY on paper.  LOL!  As you may have guessed, SNOW is the theme for this week's Simon Says Stamp Wednesday Challenge!


This week we are playing with all things SNOW!  Snow, snowpeople, snowflakes, snowfall, snow.... cones...k, well, maybe not that last one, but you get the picture.  HA!  I pulled out a gorgeous embossing folder called, Let it Snow (go figure), from Crafter's Companion for my card along with a great set of stamps  called Santa's Coming from Kelly Purkey.

Be Jolly

Umm...I LOVE that reindeer!!!!!  And I also love that my Hero Arts Cup o' Joe ink allowed for it to stamp so beautifully evenly.  That just makes me happy.

Be Jolly

And now it's YOUR turn!  Create a NEW project along the Snow theme and link it up over at the Simon Says Stamp Wednesday Challenge blog!  One lucky participant will win a $50 voucher to the Simon Says Stamp Store!  Woot!  Woot!  


You can enter up to five projects, but they MUST be new and link back to the Simon Says Stamp Wednesday Challenge.  Do it, dude.  That's $50 of FUN, I tell ya!


Have a Happy!!!


ShareThis