Showing posts with label Cosmo Cricket. Show all posts

12.01.2014

Spellbinders® Winter Sneak Peek and GIVEAWAY! - Day 2


It is SNEAK PEEK time over at Spellbinders® and we are EXCITED! We have some AMAZING new releases coming out at CHA and I am excited to give you a quick peek at two of those great die sets today! The Around The World set and the International Luggage dies are SO MUCH FUN, you guys! For reals! I love these dies! They are great for CAS designs, Shabby Chic designs, vintage, layering...you name it! Seriously... they are super fabulous. For. Reals.

First, I am going to show you how I created this super fun card!
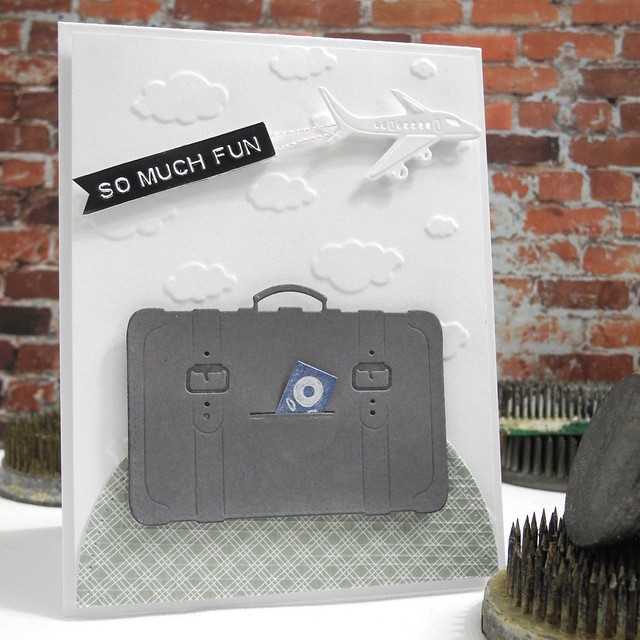
DSCN5944


Spellbinders® Supplies:
Cross Promotional Partner Supplies:
Other Supplies:
  • Ink: Blue Denim
  • Chipboard
Instructions:

1. To create the cloud background on this card, I used dies to create an embossing plate. This is a super easy technique, that makes your dies even MORE versatile! LOVE THAT! To create the plate, cut a cardstock panel and then die cut the clouds repeatedly from chipboard (I used old product packaging for mine.) and adhere them to the cardstock panel.
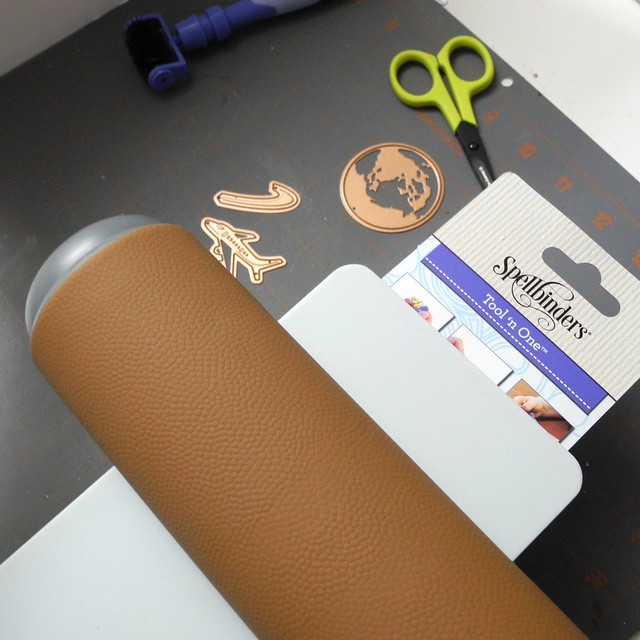
Step 1


2. Create a sandwich in your die cut machine as you normally would for an embossing plate to emboss.
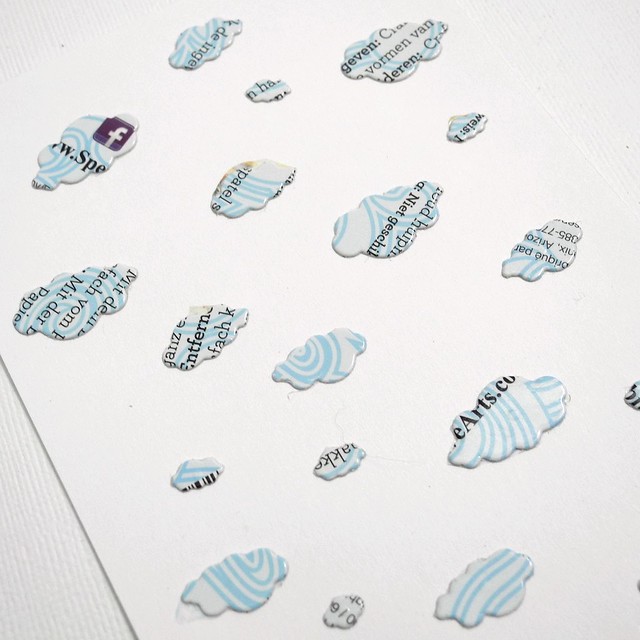
Step 2

3. Die cut the suitcase, airplane, and passport. ink the passport and insert into suitcase 'pocket', adding adhesive where needed.

4. Die cut circle, using both the cut die and the piercing die, from the textured paper and adhere to embossed background.
Step 5


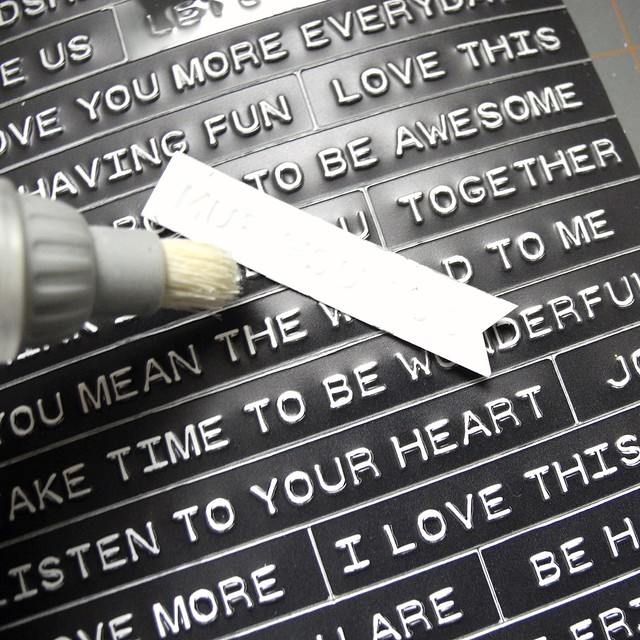
5. Brush powder or cornstarch to the back of sentiment sticker. Using foam tape, adhere string to sentiment and to airplane die cut. Adhere to card with the foam tape.

6. Adhere suitcase with passport to the panel using both a tape runner and foam tape as needed. Adhere panel to card base with foam tape.

I love how cute this card turned out and I can use my custom embossing plate again and again! It is always awesome to get the MOST out of supplies! LOVE IT!

AND... to show you another direction you can go using these same die sets, I created this fun shabby chic luggage tag! LOTS of layers on this one! I used some basic tags along with leather and fabric pieces from the A Gilded Life line. If you haven't checked those out yet...dude... DO IT!
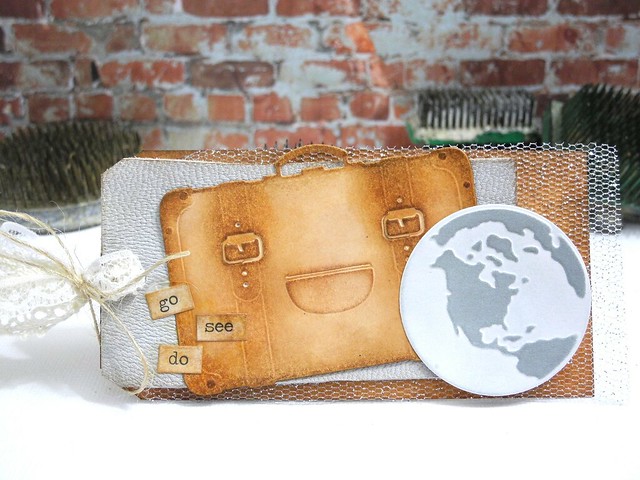
Go See Do Luggage Tag

GIVEAWAY TIME!

You have the chance to win some of the AMAZING new dies I used on my projects today! To enter, CLICK HERE and fill out the entry form. You can find the complete giveaway rules here

If you have any questions regarding the giveaway or our sneak peek week, you can contact Spellbinders® by email. No contest entries submitted via this email will be accepted. Please use the entry form only to enter the giveaway.

Be sure to head on over to the Spellbinders® Blog for more inspiration and details on our Winter Sneak Peek and Giveaway! Also, Linda Duke is sharing another FABULOUS project on her blog today, so be sure to head over there, as well!

Have a Happy!


11.20.2014

Let's Celebrate!


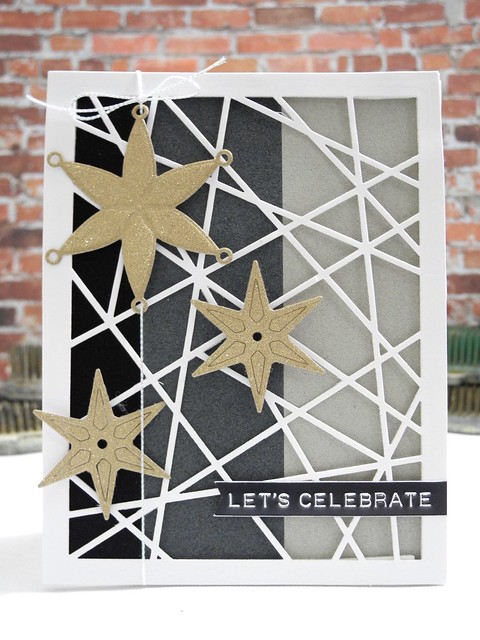
So, I love this sketch from the current Retro Sketches Challenge. But I sorta reversed it. Because that's what I do. This is why I can't use sketches. I have an inability to follow them. HA! BUT...I have been dying to play with this awesome new Glass Effects Die from Spellbinders®! Seriously, you guys. I really love this die! I combined it with the gorgeous Snowflake Bliss Die Set for my graphic Christmas card.

Let's Celebrate


I used some pretty flocked papers as the background to add both warmth and texture. The gold adds a festive shimmer while keeping the entire design classic in nature. I kind of love how this one came together. These dies, you guys!!!! For REALS! I seriously love them. Amazeballs, I tell ya! Amaze.balls.

Let's Celebrate (detail)


You GUYS! These colors, and that soft, flocked texture just make me happy. It's like a hug. A hug on a card. *sigh* So, that's my card for today! I hope it feels like a hug to you, too. A shiny happy hug. Well, now that just sounds kind of weird, but whatevs. K. Moving on....

I am also linking this up to the ShowCASe your style challenge!


Have a Happy!

Supplies:

Dies: Spellbinders® Glass Effects Die Set, Snowflake Bliss Die Set
Specialty Papers: DCWV Flocked Papers, DCWV Glitzy Papers
Cardstock: Crafter's Companion Ultra Smooth White
String: May Arts Irridescent White String
Label: Cosmo Cricket Punch Me Stickers

3.27.2013

Simon Says: Hipsters are Cool

Okay, I should actually say that I have no idea what Simon's opinions are on Hipsters. But seeing as Simon seems pretty hipster, himself, I think he'd go with cool. But not. Like... totally in the cool way. Just sayin'.


So. Yeeaaaah.... moving on. It's an ANYTHING GOES challenge week over at Simon Says Stamp Challenge Blog this week and the Design Team is having TONS of fun playing with Mama Elephant and Avery Elle Stamps!

The Hipster Giraffe

Ummmm... I love this stamp set with all of my heart. Well...at least the parts that aren't being used up for my husband, family, dogs, ice cream, etc... you know. Just sayin'. Seriously, though. CUTEST.EVER!!!! And it just combines with those Memory Box cloud dies SO WELL! LOVE!!!

Hipster Giraffe (detail)

He's not REALLY a snob! He's totally misunderstood! Wait... nope. He's probably really a snob, but it's okay because it totally works for him. Just sayin'.

Anyway... one lucky winner this week will win a $50 voucher to the
Simon Says Stamp Store! YAY!


Be sure to head over to the Simon Says Stamp Challenge blog to see the SUPER cute inspiration the team has come up with for you this week and then link up your own NEWLY CREATED creation!!! Remember - it has to be new and you can enter up to 5 times!


To see the fun products I've used on my card, check out the links below! I've added a few other Avery Elle and Mama Elephant favorites for you to check out, too! YAY!

Have a Happy!

Jingle Out!


10.29.2009

Tutorial: My Gnomescape: Cosmo Cricket and Pink Persimmon Make Me Happy


This.
Is my Gnomescape.
What is a Gnomescape, you ask? A Gnomescape is a happy little 3-dimensional gnome home created by MEEEEEEE!!!! And it happens to be on the list of cutest things EVER! Today, I am going to share with you how to make a Gnomescape like mine (or a similar type of shadowbox piece if you happen to not be into gnomes and mushrooms and such. Although, I'm not sure why you wouldn't be into those things because they are pretty much just GREAT!!!!)

Here is what you will need. Cosmo Cricket Earth Love collection (LOVE is RIGHT!!!), Pink Persimmon Ribit Stamp set, Nikoart gnome stamp, a 6x6 shadow box frame (mine is Jolee's by EK Success), various inks and applicators, a sheet of vintage book paper, a chipboard house, colored pencils and/or markers, some glittery stuff, adhesives, and some wire. That should pretty much cover everything.

Begin by cutting your background paper to the correct size to fit the back of your frame. Mine was not quite 6x6, so be sure to use the backboard as a guide. Ink the edges (you will be doing a lot of this).

Stamp your images onto cardstock. I usually stamp a few of each that I want to use just in case I don't like the coloring the first time around. I think I colored 3 of that large mushroom before I was happy with it! LOL!


Cut out the images that you plan to use in your scene. Be sure to leave the black ink line when you cut out your images so that they really pop when layered onto the background.

Cut two more layers to add to your background. I used the bird paper in the middle and then used the rolling paper for the 'ground' in my scene. I simply used the patterns on the paper to guide my cutting. Adhere with multiple layers of foam adhesive. Note: If layering onto different levels your adhesive may have to be different thicknesses on the top and bottom - be sure to watch for this so you keep it all even.

Cover the chipboard house with the vintage text paper. Assemble the elements onto the background as you want them.

Be sure to add your elements at a variety of depths to give your piece a lot of dimension.

For the very bottom of the frame I wanted to add something that looked fantastical, but also added some fun to my piece. I chose to cut a strip of cardstock to fit the bottom of the frame and cover that with a shimmer flake. I spritzed it with some Glimmer Mist to change the color a bit and added a few pearl beads, as well. I then adhered the strip to the frame.

Because this is such a dimensional piece, it only seemed right to have something hanging in my shadow box. I cut these fun flowers from the Earth Love papers out to dangle from the top.

To adhere them, simply add a glue dot to the back of the flower and attach a piece of wire. Coil the top of the wire (the part not glued to the flower) and use a glue dot to stick that to a circle of cardstock (I chose to use the center of more flowers to keep them decorative) and then adhere to the top of the frame at various depths. Trim off any excess wire.

Once you have everything in place all you need to do is assemble your frame and hang! I love this thing! It was TONS of fun to create and even more fun to have in my studio! It makes me SOOOO happy!!!!


What do you think? It's totally a happy-making kind of project! Really! I promise! It is! You could totally make these as gifts! And...it actually doesn't take all that long. I know it looks like it would take forever, but it really doesn't!

***Also, don't forget to check out the giveaway posted above!

9.02.2009

Cosmo Cricket Early Bird + Nestabilities + a Bird Cage stamp + American Crafts Packaging = CUTENESS!

No, for real! Check this out!

DSCN4456

Am I right? Of course, I'm right. I always am when it comes to matters of cuteness! I just know these things! You must learn to trust me. Really, you must.

So...here is what I did...

DSCN4451

I took an empty American Crafts Greenhouse embellishments container (*shock!* Yes...it is possible to actually use a full container of embellishments...it's okay...I was shocked at first, too!)

I created a cute decorative band to wrap around it from Cosmo Cricket Early Bird paper and added some way stinking adorable pom-pom trim for some fun and flair.

Then, I used my Nestabilities scalloped circle dies to the red cardstock and the Cosmo Cricket Early Bird paper to create the flowers. You guys know how much I love pop dots, so, of course, I used those for dimension on the flowers. LOVE IT! Then I reached for some classic 'flower center' type stamps to make the centers.

That's when I got stuck. I found an interesting snowflake and stamped it, cut it out, and hated it. Then I found a fun flower that I punched with a circle punch after stamping....and hated it. Hmmm.....

Then I grabbed my funky pointy star thingy punch (I SWEAR that's what the package said! HA!) from EK Success and punched a piece of kraft cardstock scrap to see if that color would work and I figured I'd find a stamp after determining the color match. Well, would you GUESS what happened next?! Nope! You wouldn't! Why? Because it was just an amazing stroke of creative brilliance sent from above, that's why. The scrap that I had used just happened to have Hero Arts birdcage images stamped on the other side. Well....it just so happened that the piece I punched looked AWESOME with part of the cage stamped on it! So...that's what I did! I punched out a portion the bird cage image for the center of each flower and then topped them with the button! I love it! And even better - I TOTALLY love it when that happens!!!

DSCN4450

I stuffed the little acrylic container with some brown felt and then created the stems from some freebie pencils that I had around. I just wrapped them with floral tape to get the right look and then tied ribbon around a few of them to finish it off! Now I have this WAY stinking adorable little paper flower bouquet and it is making me quite happy.

DSCN4457

AND....even better...I totally got to upcycle, and that ALWAYS thrills the heck out of me. Basically, this was overall, a wicked crazy fun project! What do you think?

ShareThis