2.26.2015

Because it's a Kite. And a Shaker. It's a SHAKER Kite!

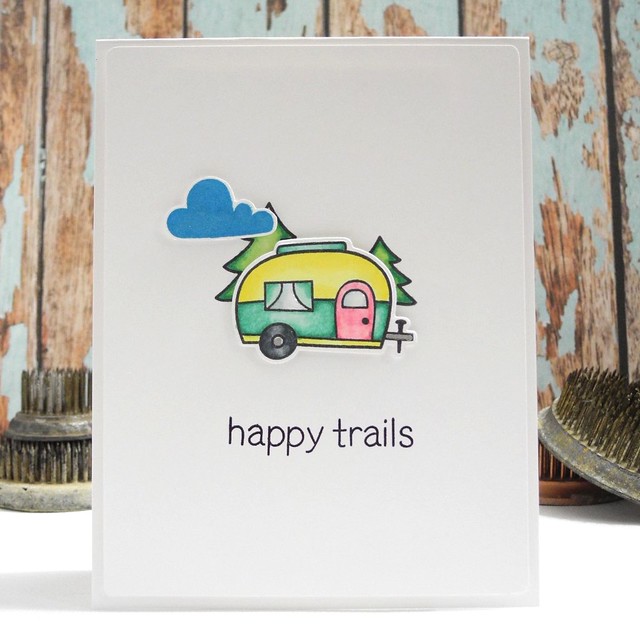
Yup. It's a shaker kite. And that, my friends, is reason enough. For reals, though, I totally am loving this new die set from Simon Says Stamp's Hop To It release!

Hello Kite


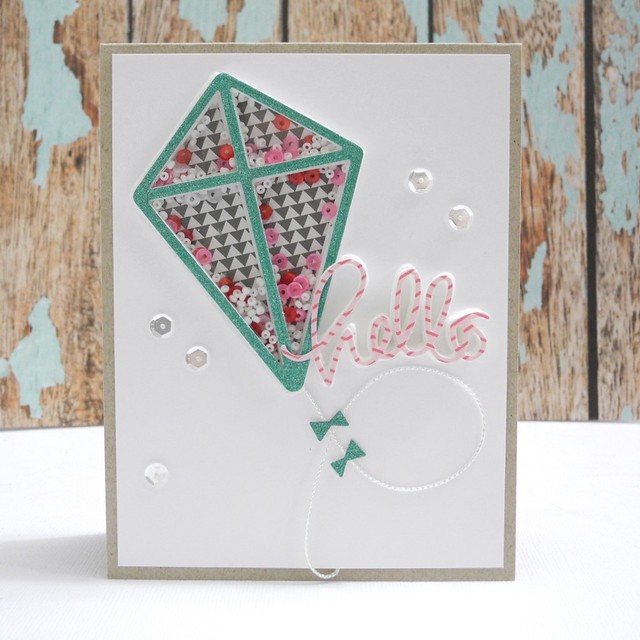
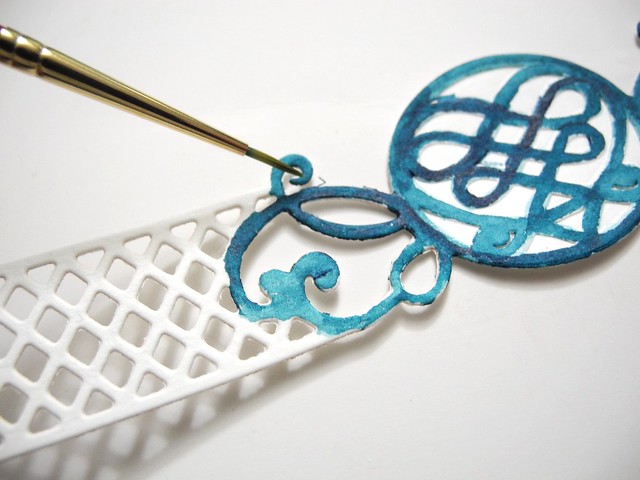
I pulled out the fun foam for this one. I find that for shaped shakers it is really easier to use a couple of layers of fun foam than trying to do tape all the way around the image. AND...the dies cut through the foam like buttah! Easy peasy, my friends!

Hello Kite (detail)


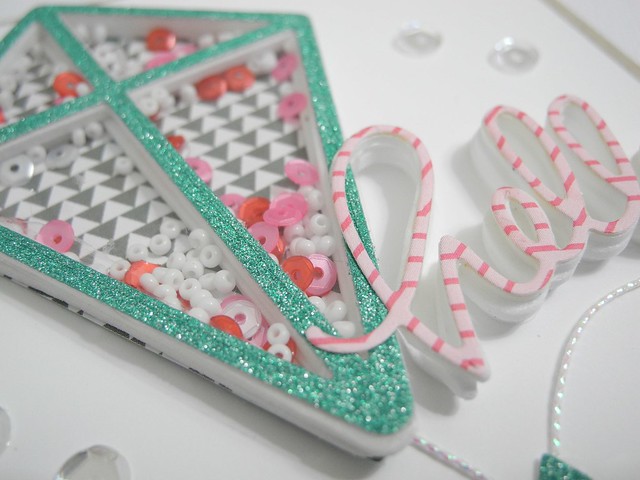
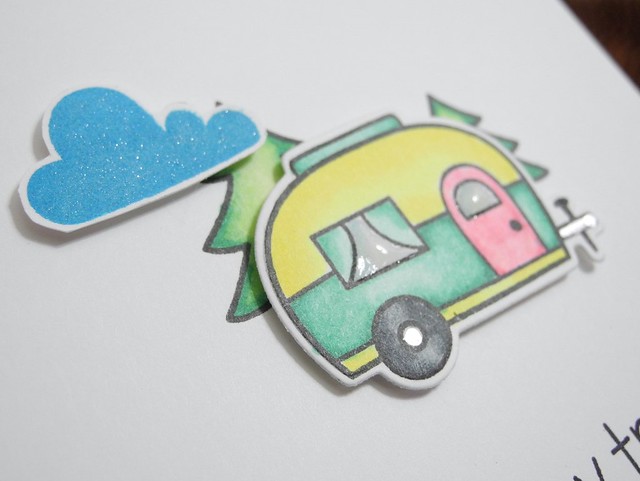
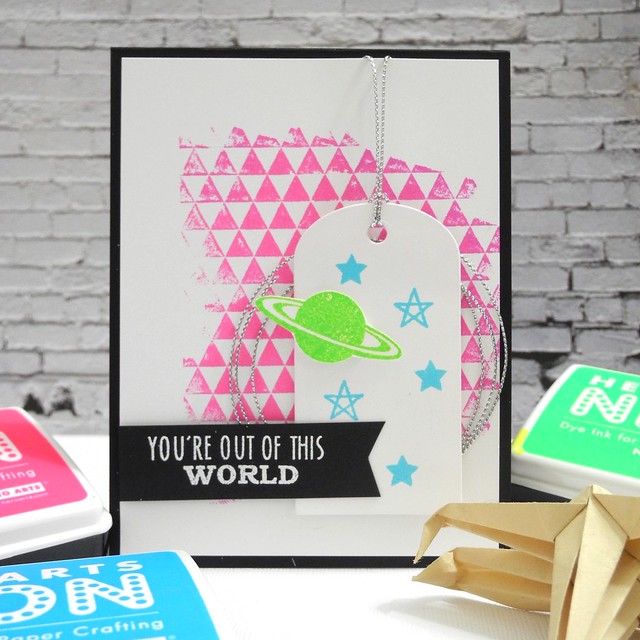
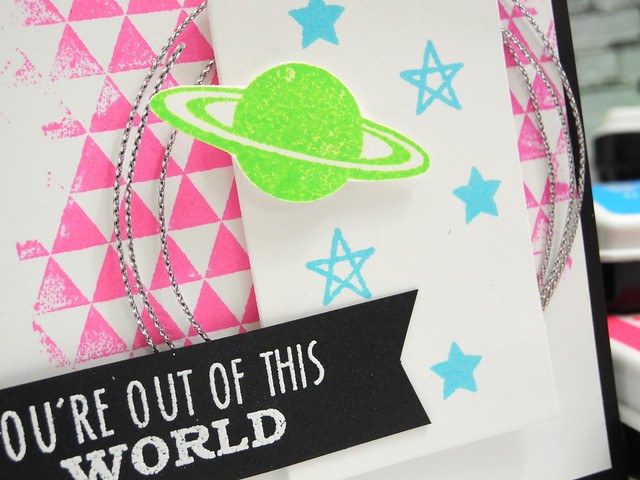
I filled this one with seed beads and sequins from Pretty Pink Posh for a little bit of a different look. I kind of love the mix. And now I need more seed beads. Obviously.

If you haven't tried the fun shaker dies from Simon Says Stamp yet,you really must check them out! I think you will love them!

Have a Happy!!!

2.25.2015

Anything Goes!


It's Anything Goes week over on the Simon Says Stamp Wednesday Challenge blog this week! I know, I know, everyone's FAVORITE! YAY!!! The design team is using Lawn Fawn products this week. You don't have to use them to join in, but we love to see you use them with us if you have some! 

When I saw THIS adorable card by Tracey McNeely I was super inspired. I absolutely loved it and used it as the jumping off point for the two cards I created for today! One is HEAVILY inspired (read: copied) and the other came after that one because I was just plain old having fun with my Lawn Fawn stamps! YAY! I do so love it when that happens!

Happy Trails

For this one I stamped my trees and colored them on my panel and then stamped, colored, and die cut the little trailer. SO fun and a clean and simple design that makes me smile!

Happy Trails (detail)

(Confession: My Glossy Accents weren't quite dry when I took this shot. There's no minute like the last minute, right? HA!)

Get Well Soon

And then this one. Oh, white, glorious white. I do love white space. Tracey's card was definitely the driving force on this one, but it had to be made! I simply cut the white panel, rounded the corners, and stamped the sentiment. I then stamped and colored the Rx bottle and die cut it, adding it with foam tape. A bit of Wink of Stella and Glossy Accents adds sparkle and shine to the heart! LOVE IT!

Get Well Soon (detail)


Now it's YOUR turn! Anything Goes, so you have NO excuses! Make something new and link it up for your chance to win a $50 Voucher to the Simon Says Stamp Store! Woot! Woot!


Supplies:

Markers: Spectrum Noir


2.24.2015

All the Best with Lil' Inker Designs


Lil' inker Designs recently sent me some fabulous goodies to share with you! I absolutely LOVE these gorgeous flowers from the Sketched Floral stamp set. The coordinating dies make it super easy to create fantastic designs with them, too! I combined them with a bold color scheme and the wonderfully useful On the Diagonal die for this card.

DSCN7290


I created the background by stamping the flower numerous times in black ink. I began in the middle and worked my way out from there. I love how it turned out! So bold! The stitching on the On the Diagonal die allows it to stand out and carry the die cut purple flower really well! I love that!

All the Best (detail)


Be sure to check out the Lil'inker Designs blog for lots of inspiration using their adorable stamps and dies! I have to admit, I love that they are a Massachusetts based company! We don't get many craft companies based around here, so that makes me smile!

Have a Happy!

(I was given stamps and dies for this post. All opinions expressed are my own. All artwork is my own.)

2.23.2015

Hop To It!

Have you seen the latest from Simon Says Stamp?! The Hop To It release is live and it is fabulous! So many cute stamps and dies to choose from! And many have a spring time feel and I was QUITE ready for that here in snow-filled Massachusetts!

Thinking of You


I used the brand new Artful Flowers stamp set for this card. I LOVE these flowers! They just cry out for watercolors, so that is exactly what I did with them! I painted the flowers with watercolors and then used Spectrum Noir Aquas to add some depth of color to the stems. I heat embossed the sentiment in gold on a strip of grey paper, trimmed it into a banner, and adhered it with foam tape. A few simple sequins finish it off!

Thinking of You (detail)


You can find my complete supply list below. Be sure to head on over to the Simon Says Stamp store to check out this release and more!

Supplies: (Links are affiliate links. Your support is always appreciated!)

Stamps: Simon Says Stamp Artful Flowers
Watercolor Paints: Zig Kuretake 24 Color Set (I love these paints. Definitely a great tool!)
Watercolor Paper: Tim Holtz
Patterned Paper: Pebbles Inc. Happy Day 6x6 Paper Pad
Sequins: Pretty Pink Posh Marshmallow Cupped Sequins 4mm
Ink: My Favorite Things Hybrid
Cardstock: Neenah Desert Storm

Have a Happy!

2.18.2015

A Bit of Texture

Hello, folks! We have another fabulous new challenge for you today on the Simon Says Stamp Wednesday Challenge Blog! This week we are ADDING A LITTLE TEXTURE to our projects! Yes, that's right, we want to see you add texture in some way to your creations this week. The design team is showcasing Simon Says Stamp Exclusives on our projects this week. If you have some, we'd LOVE to see how you use them for the challenge, but they aren't required to enter.

Gold Floral Thanks


I pulled out some favorites for this one! I used the Grid Background stamp along with the Dots and Lines stencil to create my physically AND visually textured background. I then added a bit more texture by gold embossing the flower from Friendly Florals and layering that over some gold thread. The sentiment is die cut from Bazzill Gold cardstock and layered a few times to give it depth and dimension. I super duper love how this card turned out.

Gold Floral Thanks (detail)


As I was beginning the design work on this card, I wasn't sure if I wanted to go with the white grid background or something darker. Soooo...instead of actually MAKING a decision (who wants to do that, anyway), I just went ahead and made BOTH! Here is another take on this design.

Gold Floral Thanks (dk background)


For this one, the background is left a bit more plain, but the dark color fills that space beautifully. I used the same techniques for the rest of the design and even used the same colors. I love how they are both so pretty, and yet, pretty different.

Gold Floral Thanks (dk background detail)


You can find the complete list of products I used for my two cards below, along with links (they are affiliate links) to find the items in the Simon Says Stamp Store.

OH! And Speaking of the Simon Says Stamp store, one lucky participant in this week's challenge will win a $50 Gift Voucher to Simon Says Stamp! TOTALLY worth entering, you guys. For reals, though. Just do it. Go make something fabulous!


Supplies:

Gold Cardstock: Bazzill Gold Metallic (DUDE... you need it.)
Gold Sequins: Studio Calico
Embossing Powder: Stampendous (Gold detail)


Have a Happy!


2.17.2015

Spectrum Noir Aquas and a Baby Elephant? Yes, please!

I have a quick card to share with you today. Honestly, I hadn't planned to post today, but after using the new Spectrum Noir Aqua pens I was WAY to excited to not share them with you right away! These are a watercolor marker. The blend BEAUTIFULLY with water and also with each other. I played with them for the first time (so, mind you, no practice really... LOL!) and created this simple and super fun card.

Not to Get Carried Away


The stamps are from the new WPlus9 Unforgettable stamp set. It is super cuteness and was a perfect fit for these new pens! I stamped with MFT Hybrid ink and then used the pens to fill in color, layering to achieve the look I wanted. I then blended them with water for a finished watercolor look. SO easy and I love how beautifully intense the colors are! For reals, though.

Not to Get Carried Away (detail)


That's all! Nice and simple, but I just had to share! These things are just too much fun!

Have a Happy!

2.15.2015

Pinkfresh Studio February Blog Hop and Giveaway!


Welcome to the Pinkfresh Studio February Kit Blog Hop! We are SO excited to share this months fabulous kit with all of you! If you came from Christin's blog you are on the right track! If you just found us and would like to start from the beginning simply hop on over to the Pinkfresh Studio blog and follow the links along the way!

Choose Happy


I created this card using the February kit. I SO love the adorable stamps, dies, and embellishments in this kit!!! I pulled out a sheet of paper from the Up in the Clouds collection as my background, and the stickers, gems, and stamp were all from the kit. SO FUN!

Choose Happy (detail)


AND, we are not only sharing some inspiration using the kit, but we are also giving away TWO kits! One lucky winner will win the January kit and one lucky winner will win the February kit! You guys, for reals, these are SUCH AWESOME KITS.


There are three ways to enter! Do one or all three!

1. Comment on the Pinkfresh Studio Blog.
2. Like the Pinkfresh Studio Facebook Page.
3. Follow Pinkfresh Studio on Instagram.

Winners will be announced on the Pinkfresh Studio blog on 23 February.

Pinkfresh Sneaks start on the 5th of every month and a new kit is released on the 15th of every month! Check out the Pinkfresh Studio website to subscribe and get HAPPY MAIL every single month! YAY!

The next stop on the hop is Kristen!

Have a happy!

2.13.2015

A Five Minute Valentine

***Don't forget to enter yesterday's giveaway!***

Looking for an adorable card that you can whip up in bulk before tomorrow? Or perhaps you just need one, but you need it fast! I got these stamps in the mail the other day and didn't have a ton of time, but I wanted to make something, so I created this fun little card in about five minutes. I love it. It makes me smile!

Five Minute Valentine


The stamps are from Reverse Confetti and they are ABSOLUTELY ADORABLE!!! I super love them. Had to have them. It was really that simple. HA! I then used WPlus9 inks to add color to the bowtie and hair bow, along with the little hearts and the sentiment. I colored with Copics, but kept it simple by only using flat color. I used a whopping two markers to color these cuties. Yup. Just two. It's allowed. I promise.

Five Minute Valentine (detail)


I finished it off by rounding the corners with the 1/8" corner chomper. This is a new toy in my studio and, you guys, seriously....it is AMAZEBALLS! I already had the 1/4" version, but this tiny rounded corner... BE STILL MY PAPER LOVING HEART! For reals, though. It's awesome.

And that, my friends, is what I have for you today! Be sure to stop by yesterday's post to enter to win a Gift Certificate to Simon Says Stamp!

2.12.2015

Simon Says Stamp Giveaway!


As you know, I am a big fan of Simon Says Stamp and I decided that today needs a GIVEAWAY! So, leave a comment telling me something happy and one lucky winner will get a $20 Gift Certificate to Simon Says Stamp!

*Giveaway open to anyone who can use a Simon gift card. I will keep this open through Sunday, Feb. 15th. Winner will be announced on the blog.*

That's all!

Have a Happy!

2.11.2015

All Creatures Great and Small

Hell, friends! Well, last week's All Things Bright and Beautiful challenge was pretty awesome, but now we have to keep that fun going this week with a new challenge. It seems only natural to go with All Creatures Great and Small! Yup! We want to see you create something with a critter of some kind! The design team is featuring Paper Smooches products today, so you are going to see some super cute stuff over on the Simon Says Stamp Challenge blog today!

Miss You


This card is one of those that just sort of came together by accident, but I do love it. It is sweet and colorful, and just makes me smile. I used the Paper Smooches Blossoming Buds and Paws for a Cause sets along with Chameleon pens for this one. I kept the design simple.

Miss You (detail)


And now it is your turn! Create something NEW based on the All Creatures Great and Small theme and link it up to the Simon Says Stamp Wednesday Challenge blog! One lucky participant will win a $50 Gift Voucher to the Simon Says Stamp store! Woot! Woot!


Have a Happy!

2.10.2015

A Hippo Birdie To You!

Yup. That's adorable. And punny. And you know how much I enjoy a quality pun. Or a lesser quality pun, at that! HA! Over the weekend I pulled out this slightly older Avery Elle stamp set to play. You know... just for fun! WHAT?! Yup. I totally did that.

Hippo Birdie


Oh, my LOU, this was fun to do, you guys! For reals, though! So, this is a whole lot of one layer stamping and inking. The very first thing I stamped? The hat. No. For reals. I stamped the hat and then masked it to stamp the hippo and then added the glasses with the hat mask still on. I then removed the hat mask and colored the image in all of it's adorableness. You GUYS! It's a little hipster hippo! WITH A BIRDIE! I can't even....

Hippo Birdie (detail)


I used Wink of Stella over the Spectrum Noirs to add a bit of sparkle to the birdie and then used Glossy Accents on the glasses because, well, glasses. I then created a mask of the bottom of the hippo and layered that with a straight edged mask to ink the grass. I used a few colors of ink from Simon Says Stamp and Ranger Distress inks. Finally, I added some adorable die cut clouds from Spellbinders to finish off the fluffy cute sky! Yup. Fluffy cute. It's a thing. It's a thing now, anyway.

I am linking this fun little card up to the Avery Elle Masking Challenge!

Have a Happy!

2.09.2015

With All My Love

You know when you get a new product in the mail and all of the sudden have ALL KINDS of fun ideas on how to use it? Well, that is just exactly how I felt when the Tic Tac Toe Fri-Die from CAS-ual Fridays Stamps arrived in my happy little studio! Today is my day over on the CAS-ual Fridays Stamps blog and I created this fun card to share with you!

With All My Love


Instead of using the die as an actual tic tac toe board, I decided to use the grid to cut quilt squares from some gorgeous patterned papers from Crate Paper. I die cut several different patterns and then used one of the grids as the guide for adhering the squares. The gold glitter heart is die cut using one of the 'pieces' dies in the set. LOVE IT!

With All My Love (detail)


I stamped the 'With All My Love' with Pale Tomato ink from Hero Arts and then overstamped the 'love' with Smokey Grey VersaFine. These colors worked SO well with these patterned papers! I love it when that happens!

Be sure to head on over to the CAS-ual Fridays Stamps blog to check out the inspiration you will find there. There girls knock my socks off! Well, not literally. That would be weird. But they are really good at what they do. For reals.

Have a Happy!

2.08.2015

Dressing Up Notebooks with Spellbinders

I love Moleskines. It's sort of an obsession, actually. They are just wonderful little notebooks that are incredibly useful and come in all kinds of sizes and paper types and they just make me happy. That being said...I may have a few more around than one might actually 'need', so to speak. Not that that ever happens. HA! Well, today I have a super fun post over on the Spellbinders blog showing you how to add some pizzaz to your little notebooks making them even prettier AND even better gifts. Be warned, however, when you finish one to give as a gift you will want to keep it, so just go ahead and make two. K? K. Glad we had this talk.

The Best is Yet to Come


I created this one after creating the one over on the Spellbinders blog. This is a much more simplistic version and I think I may like the other better, but, the simple truth is... I love them both. For reals. SO...that means you need to head on over to the Spellbinders blog to check out the one I made there along with the FULL tutorial on how to create a similar look! I think you will like this one! For reals, though!

Notebook Step 2


Here is a little sneak at the work that goes into the one you will see over there. Be sure to check it out and leave some love over on the Spellbinders blog!

Have a Happy!

2.05.2015

Because They Don't All Work

Okay, so, here's the deal. I love this card. I seriously do. BUT, it is not what I set out for it to be. You see, I attempted to use a super fun technique that Jennifer McGuire taught in the Online Card Classes Clean and Simple 4 class, however, that technique refused to work for me. I plan to try it again, but I was bound and determined to finish this card, so I did, nonetheless. I did incorporate a lot of inking on this one to create my own colored backgrounds, and I sort of love it.

Brightest Star


First of all, HOW CUTE IS SHE?! Seriously. I am in love with this adorable Shooting Star stamp set from Mama Elephant! It makes me smile! YAY! I stamped her first, and then colored with Spectrum Noir pens. I then stamped her on some Post-it tape and masked  her off to do the inking. I used Simon Says Stamp inks on Crafter's Companion Ultra Smooth cardstock. I LOVE how the inking blended so beautifully and that this is essentially all one layer!

Brightest Star (detail)


I attempted to use VersaMark over the inked background to have the ink create a cool shadow look for the stars. That's the part that didn't work. BUT, I decided to simply stamp and heat emboss the stars with white powder and I think it looks awesome, so I am happy with it. YAY!

I hope you like her!

Have a Happy!

2.04.2015

All Things Bright And Beautiful


All Things Bright and Beautiful! That's the theme for the Simon Says Stamp Wednesday Challenge this week! Yup. We're pretty darned sick of winter and thought that this would be a great time to BRIGHTEN things up by using bright, happy, beautiful colors in our projects! The Design Team is featuring Hero Arts products this week. You don't have to use them to play along, but we would love to see you rock them if you have some on hand!

Out of this World

I figured with a challenge to use bright colors it just made sense to pull out the BRIGHTEST colors I have! I used my Hero Arts neon inks for this fun card, and... yup. It's BRIGHT! LOL! I stamped the background in pink by inking only part of the stamp and then used my favorite WPlus9 tag die to create a simple tag with more bright colors.

Out of this world (detail)

You can find my complete supply list below. Now it's YOUR turn! Create something BRIGHT and BEAUTIFUL (something NEW, please) for the challenge and link it up over on the Simon Says Stamp Wednesday Challenge blog! You can enter up to five NEW projects and one lucky participant will win a $50 Voucher to the Simon Says Stamp Store! WHAT?! Yup. Totally, you guys. For reals.


Here are the supplies I used for my card. These are affiliate links and your support is, as always, appreciated!

Cardstock: Simon Says Stamp Black Cardstock, Crafter's Companion Ultra Smooth White
Ink: Hero Arts Neon Ink, VersaMark
Stamps: Hero Arts Tiny Flags Background Stamp, Hero Arts Shoot for the Moon
Die: WPlus9 Timeless Tags 2
String: May Arts Metallic String
Embossing Powder: Stampendous!
Foam Tape: Scotch (Giant Roll - totally worth it!)
Tool: Milwaukee Heat Gun (I love that thing. With all of my heart.)


ShareThis