Showing posts with label home decor. Show all posts

6.16.2015

CanvasPop Review, Discount, and Giveaway!


So, you take photos, right? And you love them, but I'm guessing you print fewer of them than you'd like. Even if you are a scrapbooker, as I know many of you are, you print them for your albums, but then they get tucked away. I was recently given the opportunity to have a photo printed on canvas by CanvasPop for free, and can I just tell you how much I LOVE this canvas! The process was super easy and the finished product is gorgeous!
Canvas Pop Canvas Review by Jennifer Ingle #justjingle #canvaspop #homedecor #photography #fenwaypark #baseball #redsox


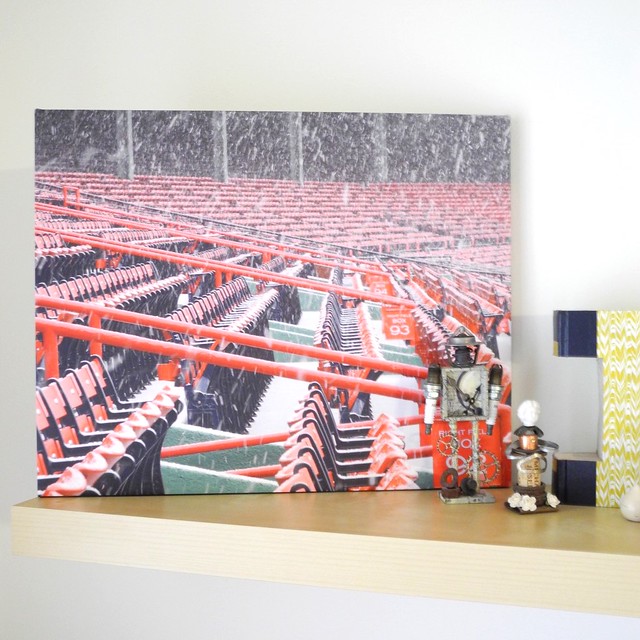
See that awesome shot of Fenway Park in the snow? Yup. I took that shot. I loved it the instant I took it and the first thing that came to mind was that I wanted to somehow incorporate that shot into my home decor. CanvasPop made that TOTALLY possible! I chose a size, a wrap, and the other specs for my canvas. You can also choose to have them framed, if you like! The colors on this thing, you guys, GORGEOUS! It printed beautifully and lost nothing in the process. I was concerned that the canvas might take away some of the detail or feel of the shot and that was NOT a problem at all! I love how this canvas turned out so much!
Canvas Pop Canvas Review by Jennifer Ingle #justjingle #canvaspop #homedecor #photography #fenwaypark #baseball #redsox


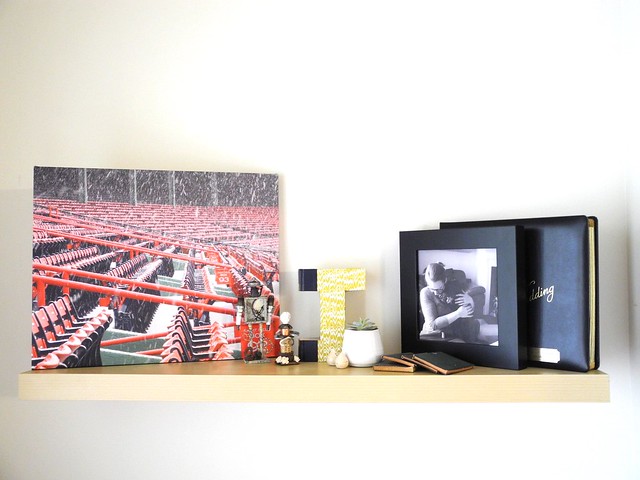
Now I have a piece of my favorite place on Earth on a beautiful canvas in my living room! I love it! And I love that it is my own work, as well. One of the great things about CanvasPop is that it takes your photos up to the artist level when you have them printed and hang them in your home! I love that. Super duper love that!

AND... CanvasPop has one amazing feature that many like sites do not have - a 100% Love it for Life Guarantee! Yes. They actually want you to love your canvas so much that they guarantee it for life. THAT is customer service, folks. For REALS, though.

If you head over there you can get 35% off your order using the code JUSTJINGLE35! Still looking for that last minute Father's Day gift? DO IT! This is perfect!

Also, CanvasPop is generously offering ONE lucky Just Jingle reader a FREE 16x20 Canvas Print! Yes, that's right! To enter, head on over to the CanvasPop Facebook page and let them know that Just Jingle sent you then leave a comment here telling me about the photo you would like to have printed!

Giveaway will close Tuesday 23 June 2015. Winner will be contacted via email. Be sure to leave a contact email. If I am unable to reach you, a new winner will be chosen.

Have a Happy!


4.13.2015

Grandma's Cupboard

I am up over on the Spellbinders® blog with a tutorial for this pretty Grandma's Cupboard project! Be sure to head on over to check it out!


In other news, today is the Red Sox home opener!!! I would SO rather be AT the game, but that didn't work out this year, so I will wear my Red Sox shirt and cheer loudly enough for them to hear me at Fenway. That works, right? I'd say so. HA!

Have a Happy!

3.17.2015

Make it 3D with Bazzill Basics

I have some VERY exciting news to share with you today! I am now a member of the Bazzill Basics Design Team! I am beyond thrilled to be joining this awesome team of amazingly talented designers! My very first post is up over on the Bazzill Basics blog today and I would love for you to stop by to check it out!

DSCN7420


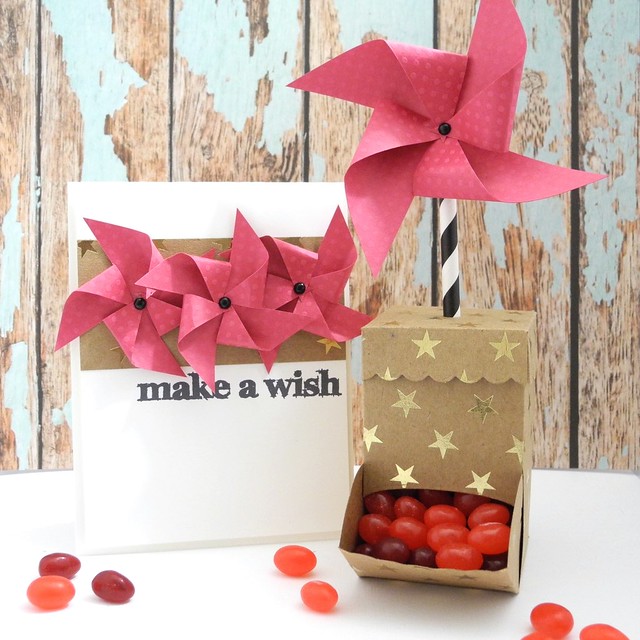
I created this super fun candy box and coordinating card. You can find more information about this project, along with a ton of inspiration on the Bazzill Basics blog.

Have a Happy!

12.17.2012

Glitter. I like it. Just sayin'.

Yes. I'm one of those people who actually LOVES glitter! Even the kind that isn't already encased in glue! HA! When this fabulous Pine Lake StandUp Village came from Retro Cafe Art Gallery ALL I could see was glorious houses covered in GLITTER!!!! YAY!!!!! So...that's what I did. Just sayin'.

Glitter Houses

I chose three of my favorite Martha Stewart glitters and covered the houses entirely in it! LOVE!!! I used Liquid Pearls to accent the windows and doors.

Glitter Houses (detail)

I added a few drops of liquid pearls to the little bottle brush trees to give them a pretty holiday feel and glued them directly to the base in front of each home. I just love how cheerful and fun this one is!!


So...a bit of holiday decor to make everyone smile! I kinda love it. I hope you are all well! Have a Jingle-tastic day!

Jingle Out.

12.07.2012

Oh, Christmas Tree, Oh, May Arts Christmas Tree...

....How Lovely ARE your Riiibbooooonnns! YAY! I finally got my Christmas Tree up and it is COVERED with May Arts ribbon! I love it. I really really do. Just sayin'.

Christmas Tree

I used two different ribbons for my tree. First, I put the lights on, then I wrapped it in Sheer Twinkle ribbon (3"), keeping it nice and billowy! I love how the lights twinkle through the pretty ribbon!

DSCN9870

I added long strips of the gorgeous navy blue Faux Linen ribbon starting from the top and gently pushing it between branches in lines down to the bottom. Again, I kept it loose and a bit billowy. I love how pretty the faux linen is!

DSCN9874

The blue and white with the twinkle lights makes me SOOO happy! I added some sparkling glittered snowflakes to the tree and then made a big 'ole flopsy-wopsy bow for the top of the tree with the faux linen ribbon. Yup. That's the official name of this bow type. I mean, really? Would I make something like that up? HAHAHAHAHA!

Flopsy Whopsy Bow

And underneath the tree, well, THERE is a special friend! JINGLE!!! Jingle is a wonderful stuffed dog from Hallmark that helps you read stories! He barks and whimpers and sings all at the right times! He's GREAT!!!!! Just sayin'. Oh...and his name is Jingle, so that automatically makes him the bestest. For reals, though.

DSCN9869

So, my friends, I hope you have enjoyed my little Christmas Tree tour! If you would like to see more gorgeous ribbon adorned trees, check out the May Arts blog today! The Ribbonistas have done some amazing decorating with ribbon!!!

Jingle Out...both of us. Just sayin'. ;)

11.05.2012

Stamped Christmas Decor - Easier than you might think!

Stampendous! and Beacon adhesives are coming together this week to share LOTS of fun and inspiring projects with you. We are playing a lot with the Beacon Fast Finish. This is a fabulous sealing finish for projects of ALL KINDS! And the best part is that you don't have to wait all day for it to dry! It dries SUPER FAST! I decided to create some fun holiday decor using Fast Finish.

Christmas Tree Hanging Frame

I stamped a simple wood frame with the Cling Poinsettia Background stamp and then heat embossed that with Black Detail Embossing Powder.

Hanging Christmas Tree Frame

I then colored the image with Prismacolor colored pencils and accented some areas with gold embossing powder. I sealed the entire frame with Fast Finish, giving it a nice, finished look!

Christmas Tree Hanging Frame

This was a really fun little project to do and I plan to attach it to a holiday gift, so it will be a gift, a tag, and a little bit of decor all rolled into one! YAY! Also, all of the products used on this piece can be found at your local Michael's store, so that make it nice and easy! To check out what the rest of the team has created, head on over to the Stampendous! blog! LOTS of fun ideas!

10.27.2012

Stampendous! New Release Blog Hop!!! {Giveaway}

Hello, friends! I hope you have been enjoying all of the awesome posts throughout the week for the Stampendous! New Release week! We all have one more project to share with you today for our blog hop! You will NOT want to miss out on this! TONS of inspiration!!!

Be sure to visit all of the blogs along the way THREE people will WIN Stampendous! PRIZES!!!!

I created a frame using the beautiful new Spring Bouquet Jumbo stamp set from Stampendous!

All of the Flowers

I covered the $1 frame from Micheal's entirely with Vintage Lilac embossing powder. I love how it has glitter in it and makes the frame sparkle! I colored the bouquet and the butterfly, cut them out, and mounted them on the frame. It is surrounded by pearls from Eyelet Outlet.

All of the Flowers Frame 2

Now you will want to check out what the rest of the team has created! You are in for a real treat today!


 Annette Witherspoon 
Asia King 
Barb Turpin 
Cyndi Bundy
Janelle Stollfus  
Jennifer Ingle 
Jennifer Dove 
Kristine Reynolds
Lea Kimmel 
Mary Dawn Quirindongo 
Melinda Gleissner  
Pam Hornschu 
Rhea Weigard
Suzanne Czosek
Taylor Usry
Tenia Nelson
Tobi Crawford
Wenday Jordan
Wendy Price 
Yana Smakula 

10.29.2009

Tutorial: My Gnomescape: Cosmo Cricket and Pink Persimmon Make Me Happy


This.
Is my Gnomescape.
What is a Gnomescape, you ask? A Gnomescape is a happy little 3-dimensional gnome home created by MEEEEEEE!!!! And it happens to be on the list of cutest things EVER! Today, I am going to share with you how to make a Gnomescape like mine (or a similar type of shadowbox piece if you happen to not be into gnomes and mushrooms and such. Although, I'm not sure why you wouldn't be into those things because they are pretty much just GREAT!!!!)

Here is what you will need. Cosmo Cricket Earth Love collection (LOVE is RIGHT!!!), Pink Persimmon Ribit Stamp set, Nikoart gnome stamp, a 6x6 shadow box frame (mine is Jolee's by EK Success), various inks and applicators, a sheet of vintage book paper, a chipboard house, colored pencils and/or markers, some glittery stuff, adhesives, and some wire. That should pretty much cover everything.

Begin by cutting your background paper to the correct size to fit the back of your frame. Mine was not quite 6x6, so be sure to use the backboard as a guide. Ink the edges (you will be doing a lot of this).

Stamp your images onto cardstock. I usually stamp a few of each that I want to use just in case I don't like the coloring the first time around. I think I colored 3 of that large mushroom before I was happy with it! LOL!


Cut out the images that you plan to use in your scene. Be sure to leave the black ink line when you cut out your images so that they really pop when layered onto the background.

Cut two more layers to add to your background. I used the bird paper in the middle and then used the rolling paper for the 'ground' in my scene. I simply used the patterns on the paper to guide my cutting. Adhere with multiple layers of foam adhesive. Note: If layering onto different levels your adhesive may have to be different thicknesses on the top and bottom - be sure to watch for this so you keep it all even.

Cover the chipboard house with the vintage text paper. Assemble the elements onto the background as you want them.

Be sure to add your elements at a variety of depths to give your piece a lot of dimension.

For the very bottom of the frame I wanted to add something that looked fantastical, but also added some fun to my piece. I chose to cut a strip of cardstock to fit the bottom of the frame and cover that with a shimmer flake. I spritzed it with some Glimmer Mist to change the color a bit and added a few pearl beads, as well. I then adhered the strip to the frame.

Because this is such a dimensional piece, it only seemed right to have something hanging in my shadow box. I cut these fun flowers from the Earth Love papers out to dangle from the top.

To adhere them, simply add a glue dot to the back of the flower and attach a piece of wire. Coil the top of the wire (the part not glued to the flower) and use a glue dot to stick that to a circle of cardstock (I chose to use the center of more flowers to keep them decorative) and then adhere to the top of the frame at various depths. Trim off any excess wire.

Once you have everything in place all you need to do is assemble your frame and hang! I love this thing! It was TONS of fun to create and even more fun to have in my studio! It makes me SOOOO happy!!!!


What do you think? It's totally a happy-making kind of project! Really! I promise! It is! You could totally make these as gifts! And...it actually doesn't take all that long. I know it looks like it would take forever, but it really doesn't!

***Also, don't forget to check out the giveaway posted above!

8.03.2009

Time to get your Creativity On!

Okay...Calling ALL creative people! YES...YOU! You are creative...stop arguing with me. You just need a little push to do something and get you started, that's all! THAT I can totally understand!

I know some of you consider yourselves to be creative people, however, from the comments I often receive I also know that some of you are pretty sure you missed that part of the assembly line when God made you. Um...nope! You've got it, you just need to find your niche! I truly believe this!

I can't draw, I can't really paint, I can't sculpt things that look like actual 'things.'

Really. I promise. It's amusing when I try, mind you, making it TOTALLY worth it from time to time, but these are SO not my skills.

However...I can play with paper, ink, stamps, etc. with the BEST of them! I scrapbook, I make cards, I do home dec stuff, and I find other fabulous ways to use the skills I have to create wonderful things!

Now...I want you to try! This is a great month to jump into the fun over at Use Your Stash! You see, they are really rocking the challenges this week! Kimmie and Corey have given us some good ones this month and the first one is posted today! The best part is...the challenge is a great jump start! We basically TELL you what to do, so you totally don't even have to think!

This week we challenge you to use: a frame, brads, and ink

You can SO handle that!

So, first go over and check out what I and the other design team members created here. Then create your own and link it up! I want to see my readers names on there!!!!

Here is my project for this one! I created a fabulous little wall hanging or ornament! It was way fun, a little messy, and I think it came out super cute!

DSCN4258

DSCN4257

DSCN4256

The frame is from Making Memories and I used StazOn from Tsukeniko rubbed over the metal to give it a darker color and keep with the vintage look. I attached a piece of 7 Gypsies Velvet paper as the focal point in the center, added a brad for the Target Dollar Spot at the top to attach the ribbon and sequin trim hanger. I finished off the piece with some Kaiser Kraft gem stones!

So tell me...what is coming to your mind when you think of this challenge? I really hope you participate!

ShareThis