Showing posts with label gnomes. Show all posts

5.05.2015

Because: Gnomes

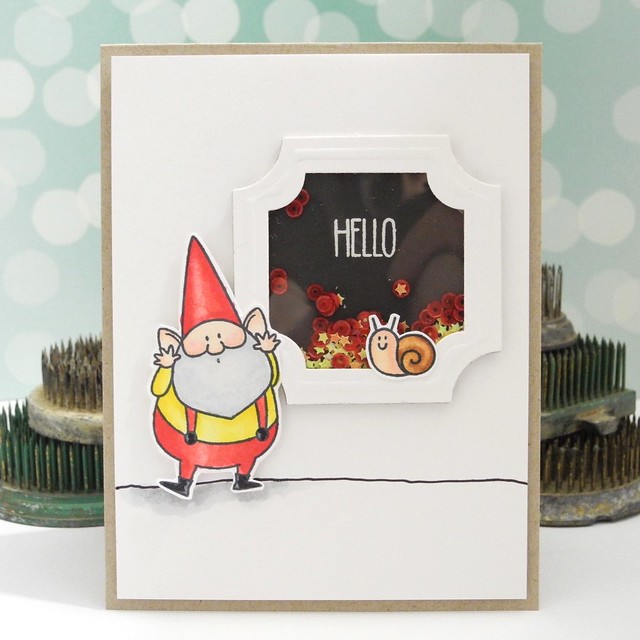
I tried, you guys, I really did. I tried desperately to NOT purchase this absolutely adorable gnome stamp set by MFT. I failed. Miserably. Honestly, it didn't even take that long. But, you GUYS, it's GNOMES!!!! Obviously I needed it. For reals, though.

Hello Gnome by Jennifer Ingle #gnomes #mftstamps #spellbinders #cardmaking #Diy #spectrumnoir


Seriously. How cute is HE?! Super cute. That's how cute, my friends, super.wicked.cute. I colored him with my Spectrum Noir pens and, obviously, did the same with the tiny snail. I fussy cut them (dies are available, but I'm cheap and already own scissors). I can't even. I just love him.

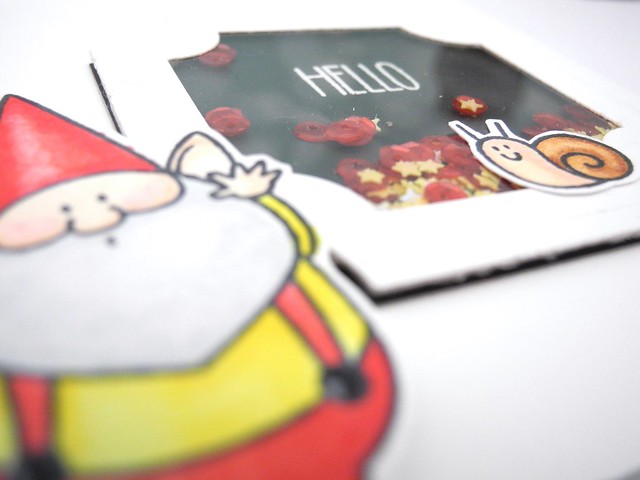
Hello Gnome by Jennifer Ingle #gnomes #mftstamps #spellbinders #cardmaking #Diy #spectrumnoir


To created the shaker, I used some great label dies (Labels Thirty Five) to create an embossed window and then used the same label to cut the background from chalkboard paper. I stamped and embossed the sentiment so it would sit inside the shaker box and then added some fun sequins.

This card, though, you guys... SO much fun to put together. I love these stamps. I'm officially glad I caved. HA!

Have a Happy!

P.S. I am linking this one up to the Virginia's View Layers and Dimension challenge

9.03.2012

A Loaf of Bread, A Gallon of Milk, and a Stick of Buttah

Do you remember that little thing from Sesame Street with the kid going to the store trying to remember that list? Obviously it was effective because I still remember that list. And recite it regularly. HA! While today's card has nothing to do with groceries, when I saw the Gallon/Quart/Pint Challenge in the Moxie Fab World, I was reminded of the list yet again!

Hello Gnome

And here is my loaf of bread, gallon of milk, and stick of buttah....wait...nope. Gallon of Red, quart of Brown, pint of Blue. I knew it was SOMETHING like that! HA! Actually, this is a design technique that I don't use very often and I really should because it always works so well and it's so fun to do, too!

Hello Gnome

That glorious ribbon is May Arts, as is the Baker's Twine. The adorable gnome brads are from Eyelet Outlet, and the Hello stamp is Hero Arts. Woodgrain paper? Totally Echo Park. Just say'n.

I hope you have a super fabulous Labor Day if you happen to be in the US. For eveyrone else...I hope you have a super fabulous Monday!

Jingle Out with my Gnomies!

10.29.2009

Tutorial: My Gnomescape: Cosmo Cricket and Pink Persimmon Make Me Happy


This.
Is my Gnomescape.
What is a Gnomescape, you ask? A Gnomescape is a happy little 3-dimensional gnome home created by MEEEEEEE!!!! And it happens to be on the list of cutest things EVER! Today, I am going to share with you how to make a Gnomescape like mine (or a similar type of shadowbox piece if you happen to not be into gnomes and mushrooms and such. Although, I'm not sure why you wouldn't be into those things because they are pretty much just GREAT!!!!)

Here is what you will need. Cosmo Cricket Earth Love collection (LOVE is RIGHT!!!), Pink Persimmon Ribit Stamp set, Nikoart gnome stamp, a 6x6 shadow box frame (mine is Jolee's by EK Success), various inks and applicators, a sheet of vintage book paper, a chipboard house, colored pencils and/or markers, some glittery stuff, adhesives, and some wire. That should pretty much cover everything.

Begin by cutting your background paper to the correct size to fit the back of your frame. Mine was not quite 6x6, so be sure to use the backboard as a guide. Ink the edges (you will be doing a lot of this).

Stamp your images onto cardstock. I usually stamp a few of each that I want to use just in case I don't like the coloring the first time around. I think I colored 3 of that large mushroom before I was happy with it! LOL!


Cut out the images that you plan to use in your scene. Be sure to leave the black ink line when you cut out your images so that they really pop when layered onto the background.

Cut two more layers to add to your background. I used the bird paper in the middle and then used the rolling paper for the 'ground' in my scene. I simply used the patterns on the paper to guide my cutting. Adhere with multiple layers of foam adhesive. Note: If layering onto different levels your adhesive may have to be different thicknesses on the top and bottom - be sure to watch for this so you keep it all even.

Cover the chipboard house with the vintage text paper. Assemble the elements onto the background as you want them.

Be sure to add your elements at a variety of depths to give your piece a lot of dimension.

For the very bottom of the frame I wanted to add something that looked fantastical, but also added some fun to my piece. I chose to cut a strip of cardstock to fit the bottom of the frame and cover that with a shimmer flake. I spritzed it with some Glimmer Mist to change the color a bit and added a few pearl beads, as well. I then adhered the strip to the frame.

Because this is such a dimensional piece, it only seemed right to have something hanging in my shadow box. I cut these fun flowers from the Earth Love papers out to dangle from the top.

To adhere them, simply add a glue dot to the back of the flower and attach a piece of wire. Coil the top of the wire (the part not glued to the flower) and use a glue dot to stick that to a circle of cardstock (I chose to use the center of more flowers to keep them decorative) and then adhere to the top of the frame at various depths. Trim off any excess wire.

Once you have everything in place all you need to do is assemble your frame and hang! I love this thing! It was TONS of fun to create and even more fun to have in my studio! It makes me SOOOO happy!!!!


What do you think? It's totally a happy-making kind of project! Really! I promise! It is! You could totally make these as gifts! And...it actually doesn't take all that long. I know it looks like it would take forever, but it really doesn't!

***Also, don't forget to check out the giveaway posted above!

1.30.2009

A Bowl of LUUUUV!

Due to the fun topic at hand today, I thought I would use a lovely font.

Then I thought better of that idea and decided it is best if you can actually READ my post! HA!

So, today is Friday. Friday is a good thing. Friday means that tomorrow is Saturday and I don't have to go to work. That makes me happy. It really and truly does.

Today is also the LAST day that you can enter my giveaway! So, I HIGHLY recommend that you go check THAT out because it pretty much ROCKS! It will close at midnight tonight and I will choose a winner no later than Monday, but possibly earlier, so keep your eyes PEELED like a banana!

I have to tell you, Valentine's Day is not a big one in our house. It never has been, really. Let's face it. Hallmark got us on this one. The decided to toss out a lot of bright and shiny red and pink and fluffy stuff and tell everyone that we should have a day of LUUUUV! (I'm not quite sure how to do the proper pronunciation key for that word, but I'm hoping you are getting the idea...) So, seriously, folks....is this REALLY a necessary holiday? I would put for that it is, indeed, not. Now, that being said....I do love me some cherry gummy hearts and WalMart only has them for Valentine's Day, so I'm not going to start a boycott campaign or anything! My point is more that we don't do silly cards and I CERTAINLY don't expect (or even want) over-priced roses that magically get more "valuable" simply because of the date. I do, however, LOVE the color RED! And, I must admit, I'm a pretty big fan of Pink, too! So, that means that I have a certain color-based appreciation for this time of year. The colors make me happy!!! AND...who doesn't love a good heart now and then?

So, I do create Valentine's cards...which I haven't done quite yet this year, but I will get there! I promise! And I also create some other fun valentinesey type projects, as well. (OMG! "Valentinesey" is actually NOT throwing the spell checker! Sometimes it simply amazes me what passes for a word in the English language! At least the American version! Yikes!....but I digress...)

I made this fun little "LOVE" banner, since it seems that banners and such are all the rage and I didn't feel like being left off that little train.....

Love Banner

Umm...I kinda love it.
I used Chatterbox ArtsyLicious papers to cover the heavy chipboard letters and then I set eyelets (remember those things!) in each letter. The ribbon was the fun part! I didn't want it to look "strung" but I did want the ribbon to be the connecting factor, so I folded the ribbon and pushed a loop through from the back to the front of each eyelet. Then I cut the loop and tied a cute little knot on the front to fasten it. I love the way it looks and I love that I didn't have to have that "over/under" kind of thing going on!

Love Banner Close Up

See!!!

Okay....so that's my fun little banner! You should totally make one! It didn't take very long and I LOVE it!!! (Hee-hee....love....yeah, anyway....moving on....)

ALSO, I just knew that I was supposed to go ahead and embrace the creative force of the season when I scooped out a small bowl of ice cream the other night. I used one of my favorite Crate and Barrell bowls that my wonderful little sister gave to us. It's red. I sprinkled it with wonderful Rainbow sprinkles and drizzled a bit of caramel on top and sat down to enjoy my evening snack. Well, after a couple of bites I looked down and I saw it!!! My ice cream had scooped out in a perfect little heart shape!!! How cute is THAT? It made me happy. Really, sometimes it doesn't take much! Anyway, I was really glad that I hadn't taken any bites from that scoop because I grabbed my camera just show I could show you!

Hearfelt dessert

I LOVE THAT!!! It still makes me happy. Heart shaped ice cream. By accident. It wouldn't have been as great if it was on purpose. Just say'n.

So, alas we come to the end of my happy little LLUUUUUV post.

My Little Gnome Pooh would like to say goodbye.

A Little Gnome Pooh

11.20.2008

My new Upcycled Watch and A Birthday Card with a Gnome on a Cupcake in a Jar

Those things seem to go perfectly well together if you ask me! HA! Anyway, that is what I have for you today!

My New Upcycled Watch

Let me start you out with a little back story here. Not much, don't worry. I have had a fairly simple, decent pair of black boots for a couple of years now....more than a couple, I think. I purchased them at top dollar from a trendy little boutique ($25 at Payless) expecting them to last me a lifetime (a season). SO....the reality of it is...they actually lasted for a few years - I don't remember exactly how many, but considering the price - WAY longer than they were required to last, THAT is for sure. However, you may have noted by now that this entire diatribe has been in passed tense. Yes. They "lasted" for a long time. When did they finally go, you ask? Well, that would be last week. When I REALLY needed them for the outfit that I wanted to wear and I no longer owned ANY backup plan of ANY kind in the black boot category. This was also, incidently, one day after I made the stunning realization that I had given away my brown boots after last season, as they were a little too worn and I just wasn't loving them anymore. Oh....that was dumb. Because you see....now....I didn't have any "normal" boots (I do have a couple cute "trendy" pairs, but they aren't the "wear with anything" type of boot, kwim?) to speak of. THIS was not a good thing! No. Not a good thing at all. I am a SHOE girl! I MUST HAVE BOOTS! Problem: Not exactly room in the budget for the WAY cute boots I saw in the latest Eddie Bauer Catalog. Solution: An unexpected stop at yet another high end trendy boutique (Charlotte Russe) where I managed to procure TWO (count 'em) TWO pairs of boots (one black and one brown) for $50. That I could manage since it was an emergency and all. BUT....alas, that left me with my old Payless boots sitting forlorn and cracked with no hope for donation as they were beyond wearable. What is one to do with such forlorn boots? One must make them feel as though they have done all that was required of them and more, thus. My next story.

I'll keep this one short and to the point. My old watch is driving me nuts. My skin has been reacting with the metal band causing chemical burns on my wrist with tiny blisters and it even made the metal on the underside of the watch band bubble up. NOT a good thing. Must replace watch.

I had an old watch with a decent face, but the band didn't really work as an everyday band because ....well because it just didn't.

Enter: the Boots.

I had planned to do this myself despite the fact that I can't sew and have not even really used the sewing maching that sits in my scrapbook room, but, alas, my wonderful husband did it for me yesterday!!!!

He cut the material from the boots to create this great new band for the watch face that I already had! All he had to add were snaps to attach the face and, obviously, to secure the band around my wrist! I love it! Isn't it great? And it totally repurposed my boots, which I think is WAY cool! Plus, if I want to make other bands with other fabrics, I can switch them out! I love upcycling!!!!!

Here is my new watch!

Upcycled Watch Band

Upcycled Watch Band

Upcycled Watch Band

Now...For the Birthday Card With a Gnome and a Cupcake in a Jar

Isn't that what is on all of YOUR birthday cards? LOL!

This card was inspired by the wonderful Travelocity commercials. My dear and wonderful husband is turning 30 on Saturday and we really aren't "talking" about that. LOL! Hence the gnomes fear of certain death.

Birthday Card for My DH

Inside of birthday card Gnome in a jar on a cupcake


This card has SO many supplies! I didn't really realize it until I had to list them all! LOL!

Acrylic Overlay: Hambly Studios
Decorative Tape: Martha Stewart
Stamps: Close To My Heart (frame behind title), Stampn' Up! (jar and lid), NikoArt (gnome - everyone needs this stamp!!!)
Colored Pencils: Prismacolor
Cupcake Punch: Martha Stewart
Cupcake Rub-on: Pink Paislee
Glitter: Pink Paislee
Transparency: Avery (over jar)
Ink: Close To My Heart (black and chocolate) Ranger (pumpkin)
Marker: Marvy Uchida (used to add the color to the dots in the frame)
Chipboard Letters: Heidi Swapp
Silver Pen: Target
Cardstock: Close to My Heart

Feel free to ask any questions. I'd love to know what projects you are working on!!! I always enjoy reading your comments! Thanks for stopping by!

Oh...and one more quick thing....

crowdSPRING, hire Kelly Purkey for your new Community Marketing Manager! Seriously, though folks!

ShareThis