Showing posts with label ornaments. Show all posts

9.27.2014

Jingle Tags!

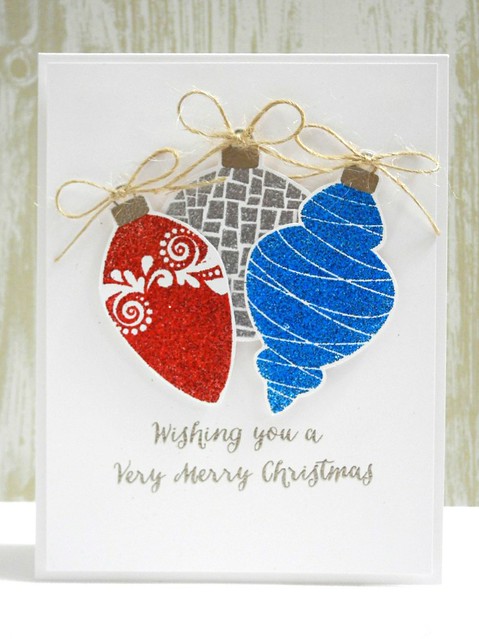
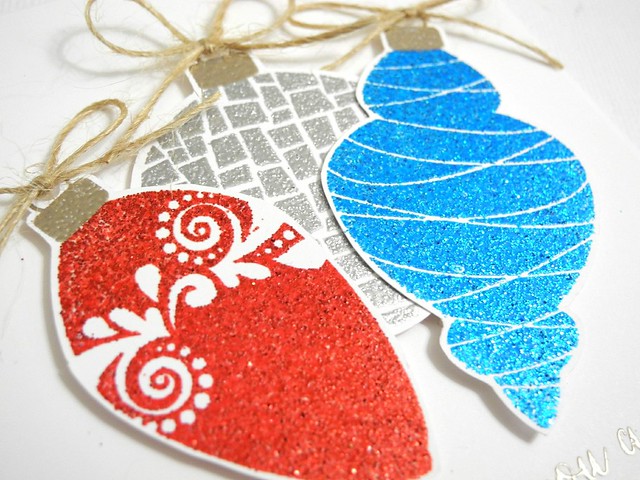
I am up over on the CAS-ual Fridays Stamps blog today with these fun Tags! I used the new Sleigh Bells Stamp set along with the coordinating Bell Tag Fri-Dies. I love how easy it is to cut, stamp, and emboss these tags to create perfect gift additions for the holidays. I left some room on each design to put the name of the gift recipient, as well.

DSCN5419


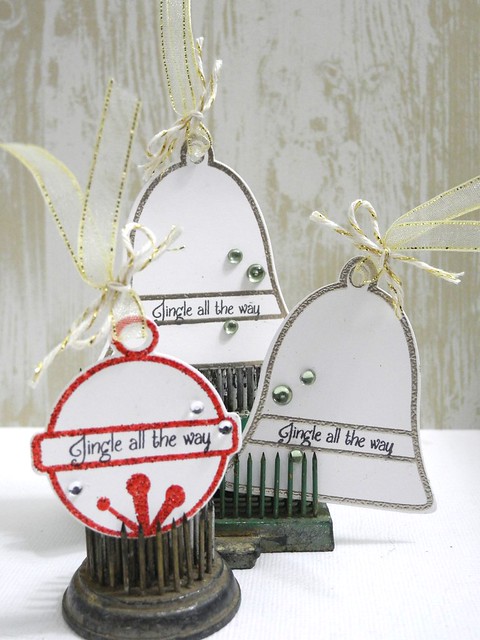
I sort of love them! Seriously, you guys, this stamp set and die set are so perfect for holiday tag making! I am going to be making a BUNCH of these! LOVE them! You could even write the name where I stamped 'Jingle All The Way' instead of adding a sentiment there if you prefer.

Jingle All the Way Tags


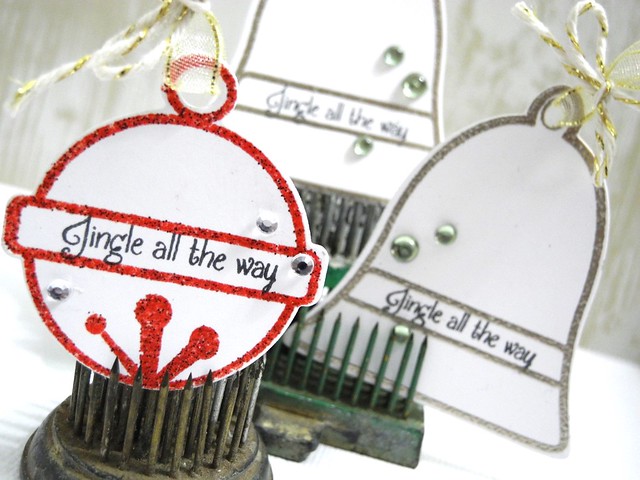
A bit of May Arts sheer ribbon with a lovely gold edge and some gold and natural twine make a pretty topper for each tag and a few Queen and Company bubbles and gem stones add some sparkle without making them crazy. GO! Make some!!!!

Have a Happy!!!

9.03.2014

Wishing You a Very Merry STAMPtember®

Simon Says Stamp Wednesday Challenge Blog

Wow! That's a lot of information in picture form up there! LOL! BUT, it is ALL TRUE! Today we have a new challenge for you AND an awesome blog hop featuring the brand new STAMPtember® products from Simon Says Stamp! The challenge this week is STAMP IT! We want to see you using stamps on your project! If you came here from Jenn's blog you are already well on your way! If not, you may want to jump back to the Simon Says Stamp Wednesday Challenge blog to begin at the beginning!

Wishing You A Very Merry Christmas


For my card today, I used the absolutely GORGEOUS new Ornaments stamp set! It even has coordinating dies to go with it! My sentiment comes from the Inside Holiday Greetings stamp set, with which I am in love. For reals, though. It's pretty darned fabulous. Like, lots. There are actually LOTS of awesome sentiment sets in this STAMPtember® release. I may or may not have ordered a couple more of them. Because I may or may not LOVE THEM SUPER DUPER TONS OF LOTS. For reals, though. I do.

Very Merry Christmas (detail)


I embossed the ornaments using some fabulous tinsel embossing enamels from Stampendous. I love how these capture the detail of the images even though they have super fabulous chunks of glitter in them! YAY! AND...it's heat embossed, so NO glitter mess! Personally, I think glitter messes are kind of fun, but apparently I am alone on that one. HA!

NOW, here's the deal, be sure to visit the Simon Says Stamp Wednesday Challenge blog for lots of inspiration and to link up your STAMP It! Challenge card! You could win a $50 voucher to the Simon Says Stamp Store!

Now hop on over to Jo's amazing blog full of inspiration for the next stop on the hop! You can find the complete list below!


Full Hop List:

Jennifer (You are here!)

Have a Happy!


12.18.2012

Ornaments Make GREAT Gift Toppers! {May Arts Ribbonista Blog Hop}

Welcome to Just Jingle!  If you are visiting from the May Arts Ribbonista Blog hop, I am so glad you are here!  If you are a regular..I'm SUPER so glad you are here!  :)  Love you guys!!!  Today I have a fun ornament tutorial for you using some fabulous ribbons!

Ribbon Ornaments


Aren't they fun!  And they aren't too tricky, either.  I love these because they make GREAT gift toppers along with a pretty ribbon or twine bow!  I began with some Layered Chipboard Ornaments from Coffee Break Designs.  I also used several of my favorite May Arts ribbons including the 1/8" Velvet in teal, yellow, and purple, the blue stripe twill, pink diagonal stripe, red metallic velvet, and silver metallic string.  I also used Lawn Fawn's Let it Snow set and Fa-La-La 6x6 paper pack.

DSCN9923


Begin by adhering the ribbon to the ornament base with Scor-Tape sheets.

DSCN9924

DSCN9925

Cover the front portion of the ornament with patterned paper and adhere over the ribbon covered background. Trim the ribbon after adhering the top.

DSCN9926

Stamp and emboss one tree per ornament. Cut out the trees and adhere to the front of the ornaments.

DSCN9927

Finish off your ornaments with a bit of the silver string and attach to gifts or hang from your own tree!

The hop lasts all week! To see the others posting today, check them out below! Don't forget to check out the May Arts blog each day this week for more inspiration and prizes, too! (The Ribbon Lady is ALL about prizes! ;))

Jingle
Karen
Kendra
Vera
Ashley

11.19.2012

Cookie Cutter Christmas {May Arts & Helmar Blog Hop}

Hello, friends! I hope you had a super fabulous weekend! I have a super fun project to share with you for the May Arts & Helmar Blog Hop today! If you have come from Jen Shears blog, you are on the right track! If not, hop on back to the May Arts blog for the complete hop list!


Today I'm showing you how to create these super fun Cookie Cutter Christmas Ornaments!

Cookie Cutter Christmas Ornaments

These make fabulous ornaments on the tree and they are wonderful accents on top of beautifully wrapped gifts, as well!

To begin, choose the papers you would like to line your cutters with. I used Little Yellow Bicycle's Once Upon A Christmas line for mine! Cut pieces large enough to fit under the cutters and match the papers to the cutter you wish to pair them with.

Step 1

Before adhering to the paper use a Crop-a-dile to punch holes in the top of each cookie cutter.

DSCN9608

Next, use Helmar's Gemstone Glue to carefully line the sharp edge of the cookie cutter and adhere it to the paper (adhere to the side you want to show). Allow to dry.

DSCN9607
DSCN9609

While they are drying, carefully apply glitter glue to the top side of the cookie cutters. Allow to dry thoroughly before moving to next step.

DSCN9610

Cut out each cookie cutter from the paper. The gemstone glue is nice and strong and will hold the backing onto the cutter nicely! Apply adhesive all the way around the outer edge of the cutter and adhere ribbon around the edge. I used May Arts Woven Burlap and Grosgrain ribbons for this.

Cookie Cutter Ornament

Pull several strands of May Arts burlap string, tied in a loop, through the hole to create the hanger for the ornament.

Moose Ornament

And that's it! These aren't too hard to create at all and they are way super fun! I hope you enjoy making some for your very own Cookie Cutter Christmas! You have reached the end of today's hop! Be sure to check back on the May Arts blog tomorrow for another list of inspiring blogs!

DSCN9614

Jingle Out!


ShareThis