Showing posts with label masking. Show all posts

10.25.2014

Winnie and Walter Leading Lady Take FOUR!


Wow! What an amazing month this has been! Thank you all so much for your support on my Winnie & Walter Leading Lady posts! I have absolutely LOVED reading your comments! Today is my final post and today we are going with a FULL dress rehearsal! Yup, complete costumes, MASKS and all! Tee-hee...I do so love these film analogies. Yes, today's cards all incorporate masking in some way.
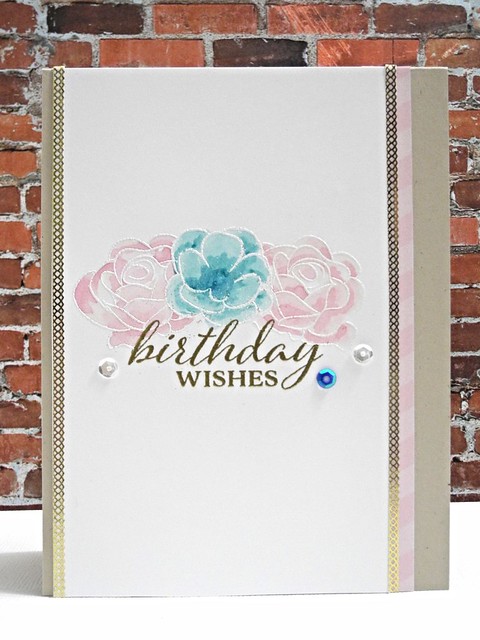
Watercolor Birthday Wishes


Masking with heat embossing can allow you to create some gorgeous watercolor images. For this card, I cut a mask of the center rose and then stamped the two larger roses on each side. I then stamped the center one in place, covered the entire thing with embossing powder, and heat embossed. Normally it is easier to stamp first, cover your image with a mask, and then stamp the background images, but I have found when embossing it can be handy to wait so you don't add a mask over the ink you need to keep sticky.

I then watercolored (On regular cardstock! GASP! It's true folks...it isn't quite the same, but you CAN watercolor on regular cardstock if you work carefully. I promise.) the flowers and stamped and embossed the sentiment in gold. Because... gold.
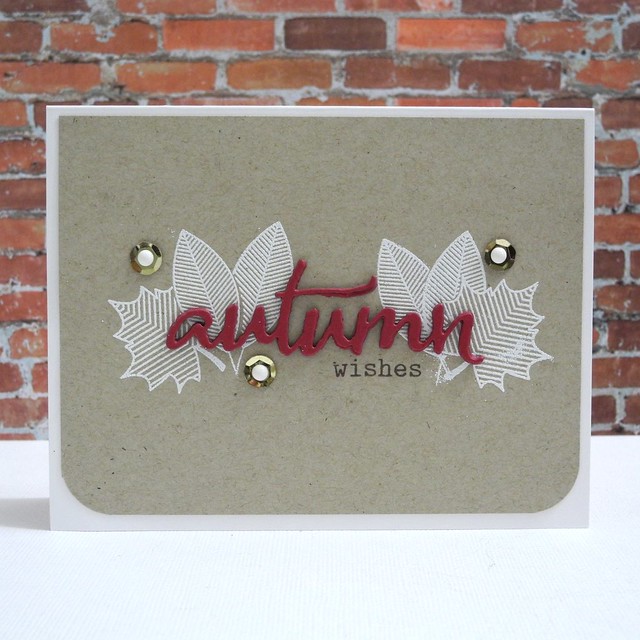
Autumn


This card employs a similar technique, but it allows the embossed images to be the star of the show! I just love these leaves from A Tree for All Seasons! The line detail in them is just fabulously graphic without being overpowering. They make me happy. Combining them in clusters, well, now that just makes me EXTRA happy!
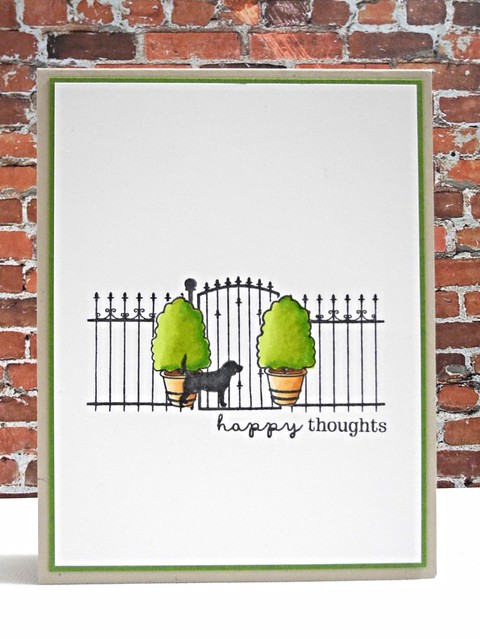
Happy Thoughts


Finally, masking is an awesome way to create a scene on a one layer card. I stamped the bushes first, masked them, then stamped the surrounding scene. I then lifted my masks, colored the shrubs with Spectrum Noir pens, and stamped the sentiment for this simple scene that has lots of dimension and remains super duper easy to mail! LOVE that! For reals, though. It's handy to actually be able to MAIL a card. Right? Right. Glad we had this talk.


So, my friends, there you have it! Our Full Dress rehearsal, complete with MASKS! I hope you have enjoyed my posts this month as much as I have enjoyed creating for them and writing them! Don't forget to leave a comment this one last time to enter to win a $30 Gift Certificate to Winnie & Walter. Guys, for reals... you want to win that gift certificate so you can BUY ALL OF THE THINGS!

And That's a Wrap!


7.04.2014

Happy Independence Day!

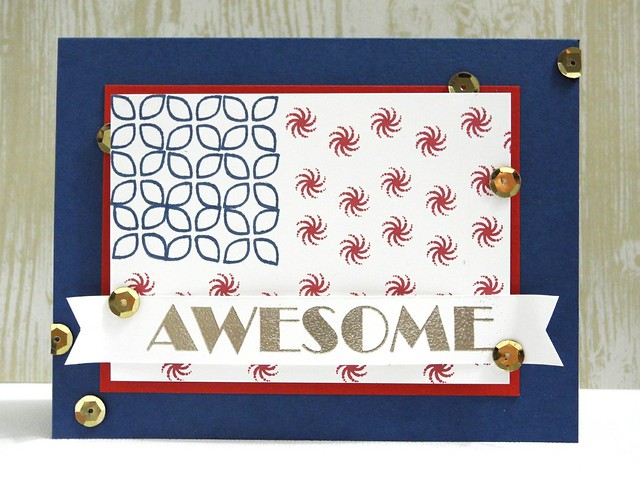
Happy Independence Day to all of my US readers! I am lucky enough to be on the CAS-ual Fridays Stamps blog on this super fun holiday (The 4th of July is one of my absolute favorites, actually) and I have a fun, patriotic card to celebrate!

Awesome Flag


I pulled out a few different sets to create my fun flag design. I love how it is whimsical and artistic and just plain FUN! I used one of the flowers from Wallflower to create the star field and then used a super fun border from Countdown to create the dancy pantsy stripes. (Yup, that's what we're calling it. Because I want to, that's why. And it's my blog and I get to make these decisions. For reals, though. Dancy pantsy.) I used post it tape to mask off the areas while stamping. The sentiment is from my favorite sentiment set, Wait for It. If you don't yet own this stamp I am concerned. Very, deeply concerned. You should have that checked.

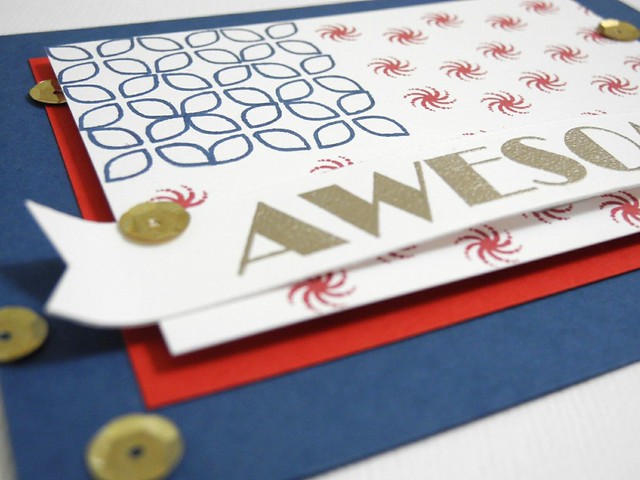
Awesome (detail)


A few sequins add to the celebratory feel of this card, along with the embossed sentiment on the wavy banner. It's just a happy-let's-have-a-party kind of card. So go ahead... have a PARTY! Happy Independence Day!

OH! And to celebrate, CAS-ual Fridays Stamps is offering FREE shipping all weekend! Just use the code FREEDOM at checkout!


Have a Happy!


3.17.2014

Follow Your Dreams

Today I have a pretty card to share with you using one of the recent releases from The Stamps of Life and some great Studio Calico papers!  I used the words4circles stamp set for this one.  I love how this is so pretty and delicate and still CAS.  'Cause that's how I roll.  :)

Follow Your Dreams


Using these same stamps, I created a COMPLETELY different look in the next card!  I love how you can totally make something new and exciting with a splash of color and a bit of technique!

Rainbow Thank You


Be sure to head on over to The Stamps of Life to check these out and also to see the videos with lots of samples!  YAY!

Have a Happy!

2.20.2014

Distress Ink Watercoloring

With the watercolor look gaining in popularity, I have been playing with different methods more and more.  For this card, I pulled out some of my Tim Holtz distress inks and my craft mat to do a little ink watercoloring.  I pressed the ink pads onto my craft mat and then used a waterbrush to pick up the colors and add them to my stamped images.

Watercolor Thank You


For the sentiment banner, I masked off an area and then used a couple of different inks in blue tones to get my ombre look.  I really love how that part turned out.  The colors just blended beautifully and did exactly what I wanted them to do.  I grounded them with a bit of black and then added a strip of glitter paper for some sparkle!

Watercolor Thank You


The postcard stamp is from the Camden Town Male 1 set from Crafter's Companion and the sentiment is from the Sentimentals Love is All You Need set.  I love the sentimentals sets.  And the Camden sets, for that matter.  This card combines some of my favorites!  YAY!!!

Have you tried watercoloring with distress inks?  I love it.  I really do.  It's a lot of fun to do and a bit less messy than pulling out the tubes of watercolors.  I have some pots, too.  Those aren't messy.  I like them.  I need to get a good watercolor palette, though.  Like... the grown-up version of those white trays with the 6 colors in them we had as kids.  If you have one that is great quality I'd love to know about it!  Well... that was a bit of a random rambling on watercolors, but, alas.  HA!

Have a Happy!!!

9.03.2013

Beautiful Beginnings


Did you hear?  It's STAMPtember® time over at Simon Says Stamp and that means that there are LOTS of newly released products and they are AWESOME!!!!  I am so excited!  When I saw this gorgeous inspiration photo over at the Runway Inspired Challenge I had quite a few ideas of how I could create a fabulous card based on it, but when I got this fabulous Lots of Dots stamp set, I knew EXACTLY what I wanted to do!  I did not, unfortunately, get it done it time for the challenge, but I still LOVE the card!


Here is what I created using this photo as my inspiration and some fabulous goodies from Simon Says Stamp!

Beautiful Beginnings


I stamped the dots in various Momento ink colors and I just love how gorgeous the flow of color is!  It was simple to stamp a long black ink sentiment along the edge to finish off the card!

Beautiful Beginnings (detail)


You should totally go check out the STAMPtember® goodness over at Simon Says.  It's pretty awesome.  Just sayin'.  I know I have several more items on my list to be added to my next order!  Woot!!!!

Have A Happy!


7.09.2013

Happy Birthday Cupcake

All you really need is some great stamps and ink. *sigh* That, combined with a couple of cuts of cardstock is all I used for this super cute (and TOTALLY mail-able) card!

Happy Birthday Cupcake

I stamped the cupcake first using the adorable Cupcake Party stamp set from Simon Says Stamp. This set also comes in the July Card Kit. Just puttin' that out there. *wink* *wink* I love that the pieces are all separate so you can make them all appropriate colors! YAY!!! I stamped the cupcake pieces and then I stamped them again on a sticky note to create a mask. I layered the mask over the cupcake and then added the polka dotted circle behind the cupcake. SO FUN!

Happy Birthday Cupcake (detail)

So, there you go! Just a fun little cupcake card for today. I like it. The colors make me happy. For reals.

Have a Happy!


ShareThis