
Step 1: Begin with all white cardstock.
Step 2: Recognize that you really are a clean and simple designer and just embrace that.
Step 3: Create this card.

Oooohh... wait. You wanted steps for actually creating the card? Okay. I can do that.
Step 1: Head on over to CAS-ual Fridays Stamps and purchase the Butterbows Stamp Set and the Bubble Labels Fri-dies. While you are there, you may as well pick up a couple of other things because: Awesomesauce.
Step 2: Trim card base, fold, set aside for now.
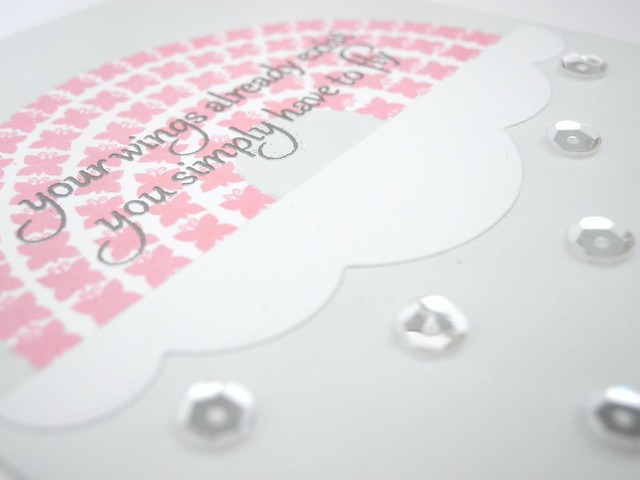
Step 3: Stamp Butterbow in Little Piggy ink from WPlus9 on a white panel. Stamp it again on Post It tape. Cut out the butterbow on post it tape and place over the Little Piggy Butterbow. (You guys, I am NOT making these names up. For reals.)
Step 4: Ink entire panel with Fairy Dust ink from Wplus9. (Nope. Still not making it up.) Allow sufficient time to dry and heat set it anyway for good measure.
Step 5: Stamp and emboss sentiment with VersaMark ink and silver embossing powder.
Step 6: Die cut large Bubble Label from more white cardstock (Because that's all we are using, remember?), cut in half, adhere beneath butterbow.
Step 7: SEQUINS!!!!!
Step 8: Head on over to the CAS-ual Fridays Stamps blog for all kinds of awesome inspiration AND get ready for a new release later this week! WHAT?! Yup. Totally.
For reals, though. You should probably do all of the above.
Have a Happy!
Step 2: Recognize that you really are a clean and simple designer and just embrace that.
Step 3: Create this card.
Oooohh... wait. You wanted steps for actually creating the card? Okay. I can do that.
Step 1: Head on over to CAS-ual Fridays Stamps and purchase the Butterbows Stamp Set and the Bubble Labels Fri-dies. While you are there, you may as well pick up a couple of other things because: Awesomesauce.
Step 2: Trim card base, fold, set aside for now.
Step 3: Stamp Butterbow in Little Piggy ink from WPlus9 on a white panel. Stamp it again on Post It tape. Cut out the butterbow on post it tape and place over the Little Piggy Butterbow. (You guys, I am NOT making these names up. For reals.)
Step 4: Ink entire panel with Fairy Dust ink from Wplus9. (Nope. Still not making it up.) Allow sufficient time to dry and heat set it anyway for good measure.
Step 5: Stamp and emboss sentiment with VersaMark ink and silver embossing powder.
Step 6: Die cut large Bubble Label from more white cardstock (Because that's all we are using, remember?), cut in half, adhere beneath butterbow.
Step 7: SEQUINS!!!!!
Step 8: Head on over to the CAS-ual Fridays Stamps blog for all kinds of awesome inspiration AND get ready for a new release later this week! WHAT?! Yup. Totally.
For reals, though. You should probably do all of the above.
Have a Happy!
I love this beauty, you know that but I had to stop by and tell you again :)
ReplyDeleteSEQUINS!! This is fantastic. I loooove it.
ReplyDeleteAbsolutely beautiful card, Jennifer.
ReplyDeleteLove how this turned out - neat stamp idea with the rainbow made of butterflies!
ReplyDeleteThis is beautiful! Love the simple design.
ReplyDeletefab-u-lous!
ReplyDeleteSuper cute design, I love this.
ReplyDelete